Making 14:th century gauntlets
2022-08-17
Revision history:
2022-08-17:
- Added images of seam close-ups and details of sewing.
. Added images to display finished gauntlet grip and flexibility.
- Corrections of spelling mistakes.
- Styling improvements(?).
2022-08-16:
- Initial version.
Backlog:
- Images of finished gloves.
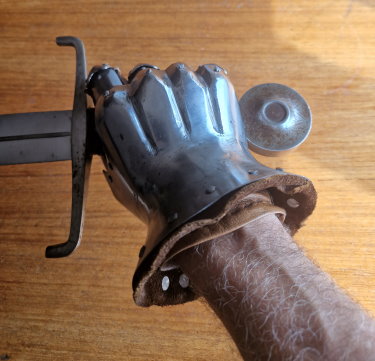
Since I made my first armor attempt in the mid 1990's I've looked eagerly at making Churburg style hourglass shaped gauntlets, but for a less rich soldier than the Churburg nobility. Yes, you can find finished such gauntlets on sale for a couple of hundred Euros, but I thought I'll get well fitting gauntlets while at it since many of the generically supplied gauntlets from vendors has been quite ill-fitting on my hands.

Requirements
My wish-list for these gauntlets were:
- Reasonable well-working protection for the hands
- As light as possible to enable long time wearing
- Good enough flexibility to not be hindering in fighting
- Looking historically accurate
- Learn something in the process
Creation process
This is a short draft description of the steps of work, and some hints to get it to work.
Tools and material used
- Anvil with a horn
- Ball hammer
- Cutting plier to cut rivets
- Scissor for leather and thread
- Leather about 1mm
- Awe for pricking holes in leather
- Nails for riveting
- Needle
- Linen thread for sewing in leather
- Bees wax to wax thread for leather works
The bells and knuckles
Luckily, I've gotten to know the master armorer Albert Collins and his apprentice Rasmus Rasmussen. The order list of Albert Collins is very long, and it would take me years to get something ordered from him, but the help of Rasmus was a lot easier to attain.

I met with Rasmus and started discussing ideas for gauntlets. The approach was my vague initial suggestion and then a wide range of questions from Rasmus:
- Decade and type of gauntlet I wanted
- How I planned of using the gauntlets, for what activities, and how often
- What type of fingers? With joints or with scales
- Measures, a lot of measures
- Lamella by the knuckles or not
- Leather over or under metal
- Type of finish (high polish, brute, mid polish)
- What type of work I could pull off myself, and what was up to Rasmus to do
- Hardening and tempering choices
- Material thickness in different parts of the gauntlets
- ...and so forth...
I was not in a great hurry (yet) so we waited until Rasmus had a bunch of gauntlet orders and he made a gauntlet making month (November/December 2021).
Then it was time for an initial fitting session. This session resulted in a few minor alterations being made to the bells of the gauntlets.
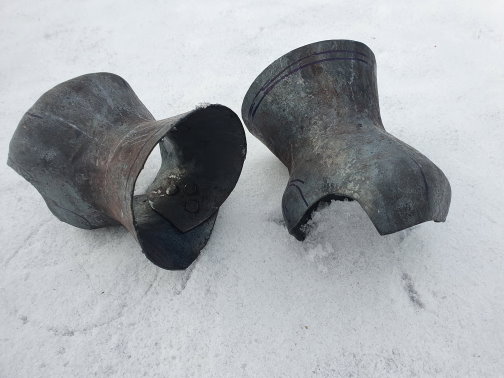
Finally, by Saint Patrick's Day (17:th of Mars) the metal parts were ready for delivery, and we met up for beers and singing and I received the parts ready for assembly.
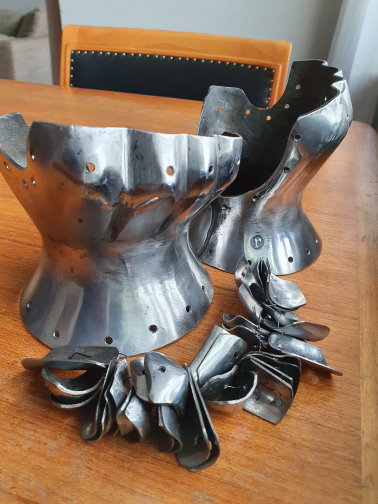
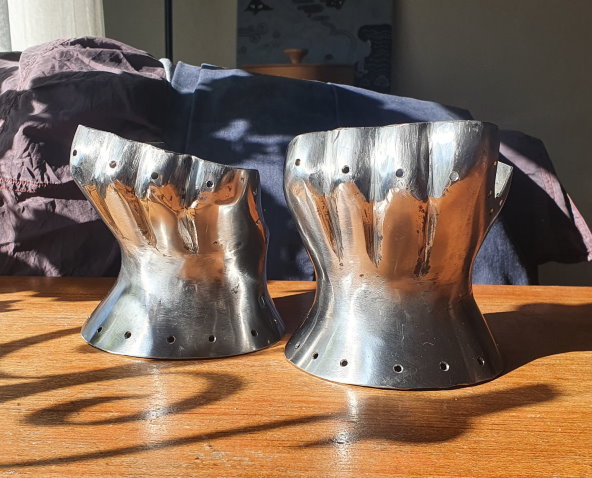
Buying leather
Meeting up with Johan Klareld and Johan Käll we drove to the Tärnsjö leather outlet where I found appropriate non-chromed leather (and a lot of other fine leathers I brought home).
The leather I got was for fastening the finger pieces together and fastening them to the gauntlet bells.
Leather edges of the bells
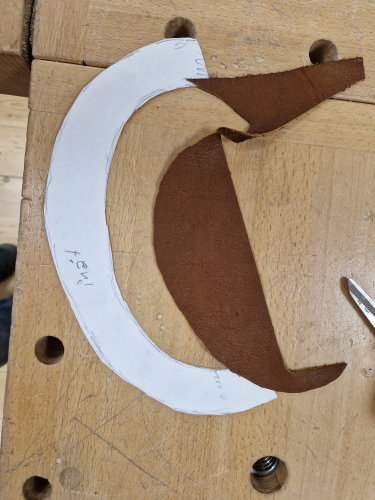
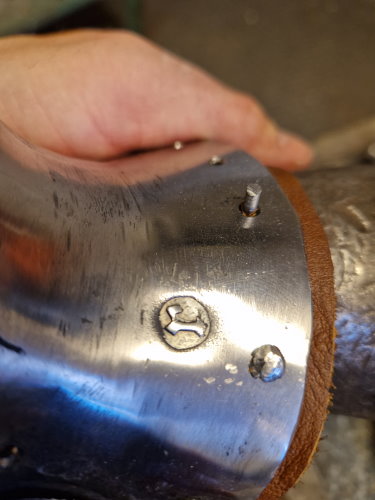
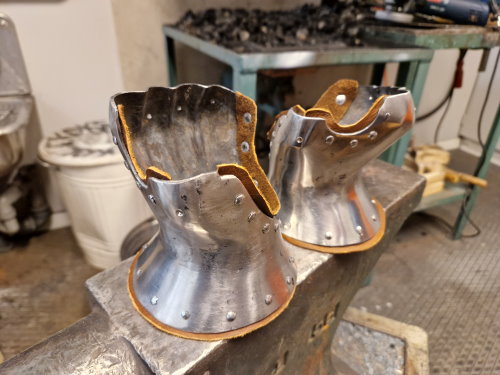
Remaining gauntlet artifacts from the 14:th century often have leather on the inside of the bell - at least around any opening and protruding a few millimeters from them. The leather is fastened with rivets. Sometimes the inner glove of the gauntlet was sewn to this leather edge, but one could assume the leather also cushions any metal clonking sounds for touching the lower arm metal pieces of the armor when worn.
Assembly of metal pieces
The advice given was to do a close fitting of the fingers. Karin Lafleurie, who works with people with injured hands at a hospital, taught me that the resting position for a hand is with bent fingers.
Another advice was to use a grinder to fit the individual parts of the finger joints. However, I had no access to any type of useful grinder, so I ended up fitting the parts tighter instead.
I normally spend Monday evenings in the workshop, so I started off the assembly there.
First, I started with the left gauntlet since I figured I'd make beginners mistakes on the gauntlet that would most often be protected by the shield anyway.
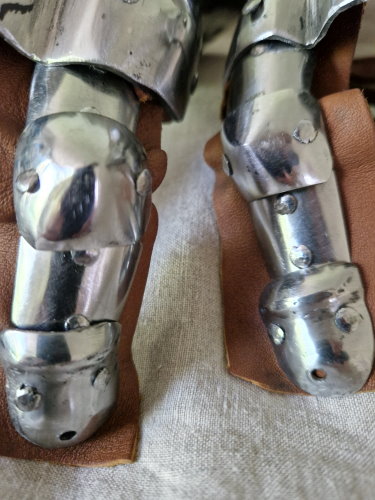
Sometimes I realized I'd benefit from more narrow fingers. This was easy adjusted on the anvil.
For assembly I used tack nails (pappspik in Swedish) for rivets. I cut a rectangular piece of leather for each finger. The leather was a bit over-size to allow for tight trimming after assembly. I ignorantly ignored the advice received from Rasmus to make the fingers first sew them to a glove second and attaching them to the bells of the gauntlets thirdly. I went the other way around and assembled the whole thing before attempting to sewing the inner glove to the rest of the gauntlet. This worked too, but at times it was a bit of a struggle to reach the seam in an easy way.

As my time in the smithy came to a halt when the summer closed in, I continued the assembly in the evenings at a crafting camp for historical crafts - in the semi-dark evenings among mosquitos, on a small medieval anvil. Eventually all rivets were done in time for going home.
I needed the full metal pieces of at least the left gauntlet in place in order to arrange the straps of another work in progress - my shield - before the departure for Battle of Wisby in mid-August 2022. As it happened both gauntlets had their metalworks ready after the Hantverkslägret craft camp.
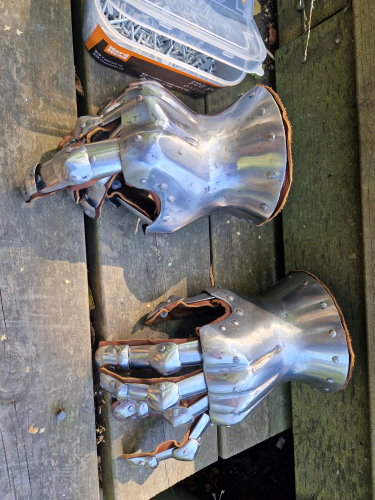
Adjustments after assembly
A few of the fingers were hard to stretch straight when worn after assembly.
To adjust these, I drenched the whole lot, including the leather works, in water and let it dry of in a stretched position. This was quite effective. Don't forget to fatten up the leather again after it has dried.
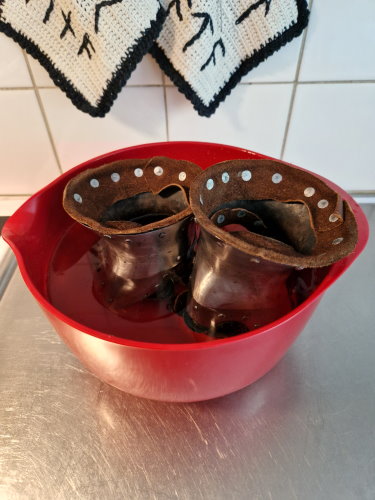
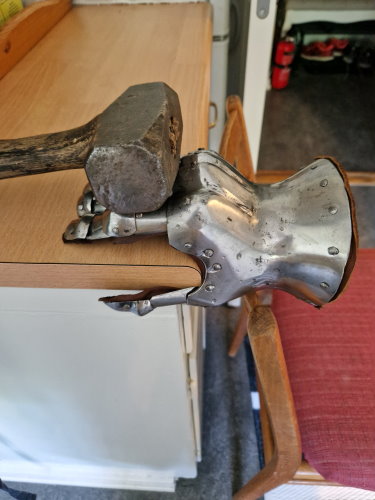
Sewing the inner glove in place
I already had a pair of gloves I inherited from my ex-wife's grandpa when he passed away. The gloves were in deer hide, very thin leather, natural color, and very well fitting for my hands. In addition, they also had finger seems that I deemed would work for attaching to the leather in the gauntlets.
This sewing was done in a haste. I only had a few hours to complete this before mustering for the battlefield. However, I managed to get the gauntlets approved for fighting with four minutes to spare for putting the rest of the armor on.

Sewing was done with simple single needle (as opposed to most leather work stitches made with two needles). I made holes in the gauntlet leather with an awl, but the leather of the inner glove was soft and thin enough to pierce with a normal sewing needle. At times I used modified pliers where I put tape on the surfaces to not make dents in the needle, for pulling the needle through.
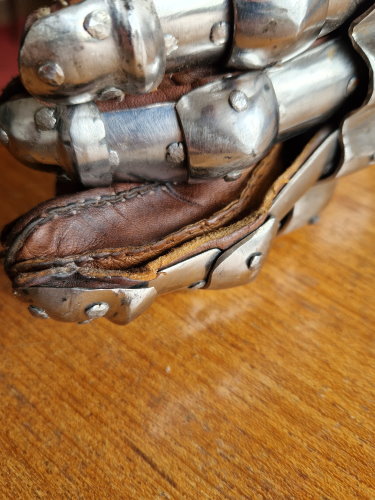
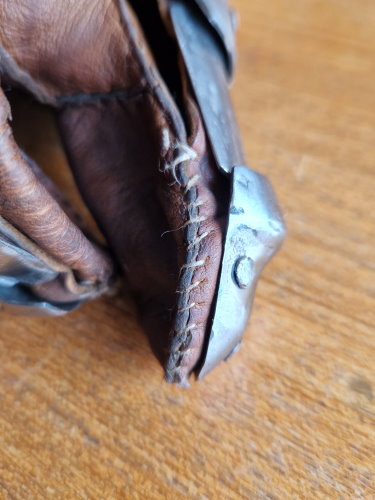
Sewing the fingers is done up to the joint, including the joint, but not the inner most stiff part of the finger. This allows for good movement in all directions.
Using the gauntlets
The current state of the gloves is that they are battle ready but not finished. I have yet to fasten the inner gloves better before they are finished. However, they have been worn in two different battles and worked very well in those. The main problem being that they require some struggling for putting them on, and off. Since hands are getting sweaty during a battle it means that once they are on, I can't take them off and expect to be able to put them back on with less than a good amount of body powder to help me. Since the fitting is almost perfect this generally pose no problem. I can drink with them still on, and tie/un-tie knots and all sorts of delicate activities.
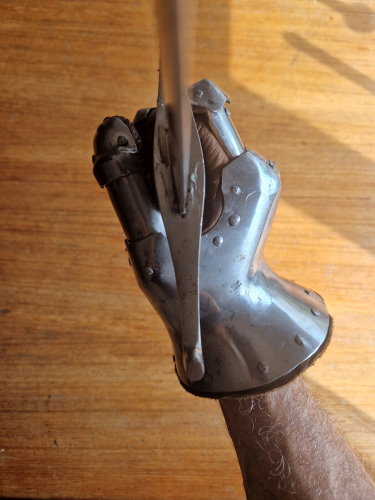
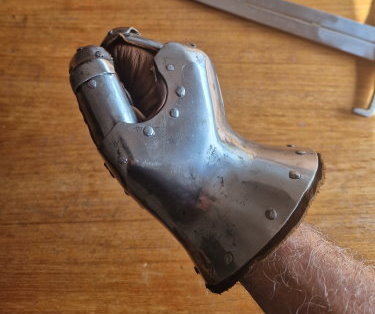
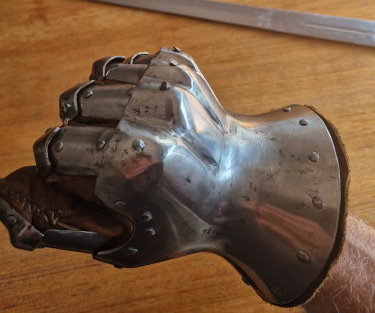

There are a few things left to take care of before calling the gauntlets finished:
- I plan on squeezing the bells a bit to allow for a better fit with a more oval bell mouth for ease of putting them on and taking them off. I'll probably use a big vise with softer inlays for this.
- I plan on sewing the fingers to the inner glove on both sides of each finger on almost all fingers - as compared to now when only a few has been sewn on to both sides. This is done both for better fit, but also for redundance if any seam break while fighting.
- I plan on sewing the wrist opening of the inner gloves to the leather of the corresponding piece of the bells for ease of putting the gauntlets on - and for historical accuracy.
- Eventually I re-adjust the gauntlets for wearing with plate lower arm armor.
Lessons learned
In the process of making these gauntlets I've made a few insights
- Read, and follow, instructions given. Read them twice, at least.
- Start in time. Deadline pressure is annoying.
- It's worth fitting stuff to your own bodily measures. A tight-fitting armor is way better than a generic one.
Thanks
Any project like this requires friends and sources for help, guidance and inspiration. I'd particularly want to send thanks to the following persons:
- Rasmus Rasmussen, for knowledge and skills
- Johan Käll, for inspiration and advice
- Karin Lafleurie, for anatomy advice
- Johan Klareld, for taking me to events where I could make use of gauntlets