Under-tunic
2024-07-22
2024-07-22
==========
* Added photos from lining and finished
2024-07-09
==========
Initial version
It's easy spending time creating the beautiful clothes your friends will admire. It's a bit more tedious creating the under-garment that few are supposed to see.
With a good pattern it's quite easy to create a good under-tunic. They have looked about the same for centuries during histrical times.
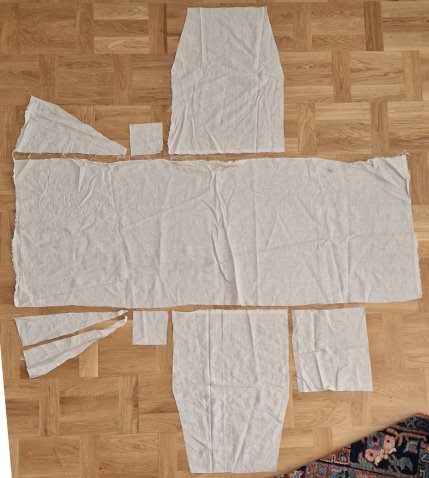
Cutting
Cutting the pieces require a sharp scissor. Really put on effort to follow the threads in the fabric to prevent it from twisting when washing it (or really only moving around in it).
Pieces explanation
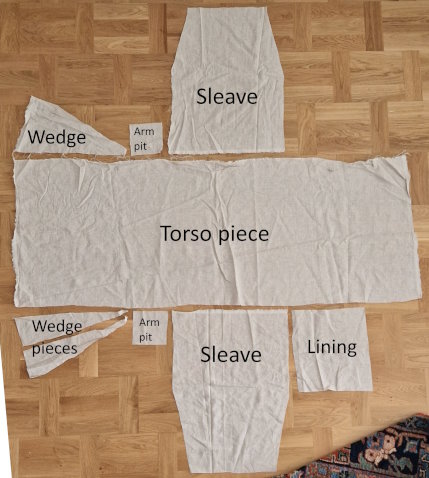
Central torso piece (the largest piece in the middle)
This piece is made up from a rectangle.
Length
The torso piece is made double as long as you want it from your sholder down since it is folded over the sholder with no seam on top.
Measure from the protruding knob of your spine up at your neck to down the length you want your tunic to be.
Width
You should measure the width between the knobs on your shoulders for the width and then add seam allowance.
Arm pieces
The almost rec tangular pieces that is narrowing up from half way down/up in the picture are the sleaves.
Length
The length of these pieces should be measured from the same point on your sholder as you measured your torso piece to down at your wrist, and add seam allowance.
Width
If your sleaves are not wide enough it's hard to get into it. Measure your upper arm and add like five centimeters and you should be good. Down at the wrist you measure your under-arm at its widest point (the muscle under the elbow) to make sure you can pull your sleaves up when doing heavy work.
It could be worth noting that the 14th century in particular was fond of really tight clothing - including the arms. If you go for 14th century garb, don't expect to be able to pull your under-tunic up.
Arm pit squares
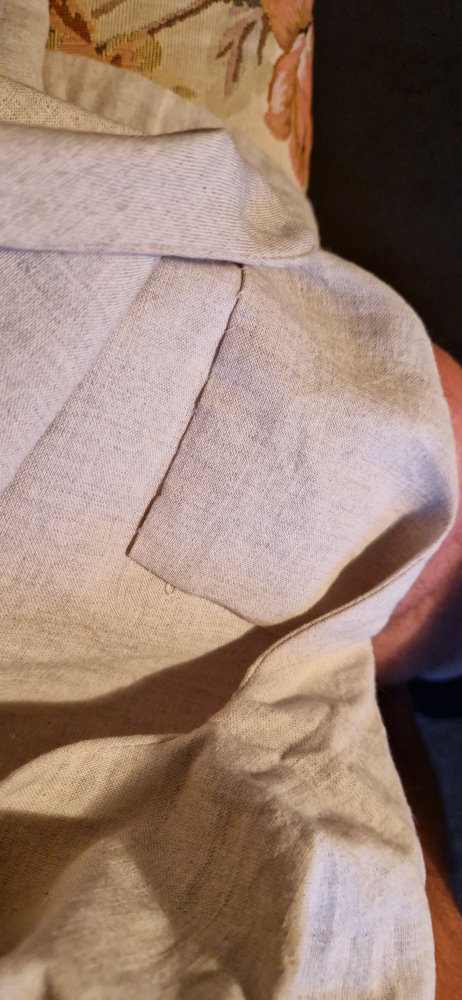
To allow for getting in and out of your tunic a square piece is put in diagonally under the arm, in the armpit of the tunic.
It generally is about a decimeter on each side, but could be bigger or smaller depending on the historical period and personal preferences.
Wedges
The wedges look a bit strange with one split in half. That's because it originally was cut from a rectangle of the fabric.
If you cut your wedges like that, remember the seam allowance so you don't cut corner to corner, but aim a centimeter or so in from the corner on the short side of the wedge rectangle.
If your chest measurement or belly measurement is wider than the measurement sholder-to-shoulder you should make sure to allow for high wedges to make room to take the shirt on and off.
If you leave the wedges out you should make sure to save a bit of slit on each side of the under-tunic to allow for leg movements.
Lining
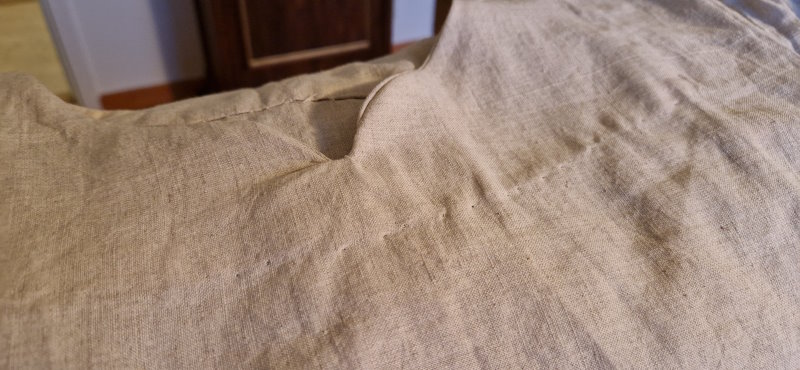
The last piece, the larger square piece. That's the lining for the collar. It will require more trimming later.
The only size requirement of the lining is that it is a few centimeters wider than the neck opening - on all sides.
See imae below for lining details.
Using zigzag stitch to overlock the fabric edges to prevent fraying
If you intend to sew the under-tunic on a sewing machine rather than hand-sewing it all you should probably zigzag all pieces of cloth before assembly.
Assembly
The assembly follows a rather logical step-to-step procedure. If you deviate from this you should know what you are doing since you might end up with a twisted shirt.
- Fold the torso piece in half where the sholders should be. Press a crease with your finger in the middle of it. We'll cut the hole for the head and neck later.
- Folt the sleaves in half lengtwise, making the fold symetrical. Press a crease in the fold at the wider end.
- Straighten the torso piece out, and the sleave pieces out and align the creases with the sleave inwards over the torso piece.
- Pin the arm pieces to the torso piece when the creases are aligned, then sew the seam using straight stitch.
- Now the arms should be attached to the torso piece.
- Pin each of the square armpit pieces each on one side of the sleave-torso corners. Then sew it in place.
- Sew the split wedge together. Make sure it looks like a neat triangle when finished.
- Pin the wedges in place on one side of each wedge. Start from the top since that's where the accurate measurement of your chest-width is. If it ends up being too long, you'll just cut it later.
- Sew the wedges on their pinned side
- Now it's time to make it look like a shirt by sewing the sides together. Start at the free armpit corner and pin that to its place in the corner of the free sleave and the torso piece. The sew from there out the armpit piece and the sleave. Then start againd from the armpit corner and sew down the side of the tunic to the bottom hem to be.
- Do the same on the other side. Now it all should look like a neck-less shirt.
- Cut the hole for the neck. It should be two or three centimeter wider than your neck on both sides and about two centimeter below the fold of the fabric on the back, and maybe four centimeters below the fold on the front. Try it on until you can barely squeeze your head through. The hole will be a bit wider when the lining is attached, so this is often a good measurement. Sometimes I get annoyed and cut a slit down to allow for the head to get through. That is allright, but you end up with a harder fitting of the lining.
- When you think you are happy enough with the neck opening you should make a replica of the opening on the larger square lining piece (that should now be the only piece not being attached yet). This require some messing around but it's not important that it's a 100% accurate. A similar hole will do.
- Align the lining to the neck opening of the torso piece and sew them togheter. The lining should later fold inwards so keep a sharp head.
- Iron the seams and the lining.
- Stich down the outer edges of the lining with small hand-sewn stiches on the inside of the tunic to make a nice neck opening.
- Try out a good arm length in a mirror, then hem the sleave openings by the wrist.
- Hem the whole under-tunic at the bottom.
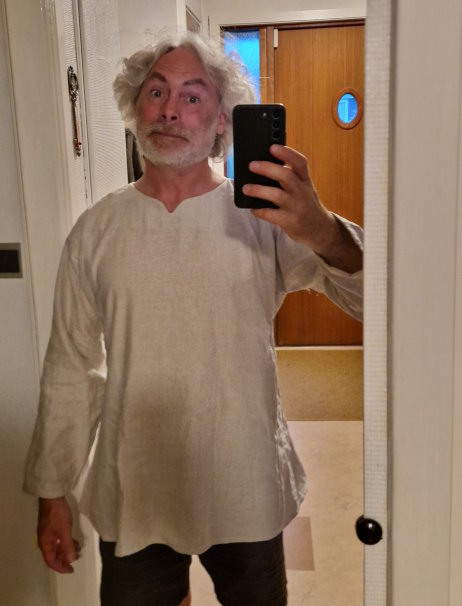
- Put the piece on and admire yourself in the mirror.
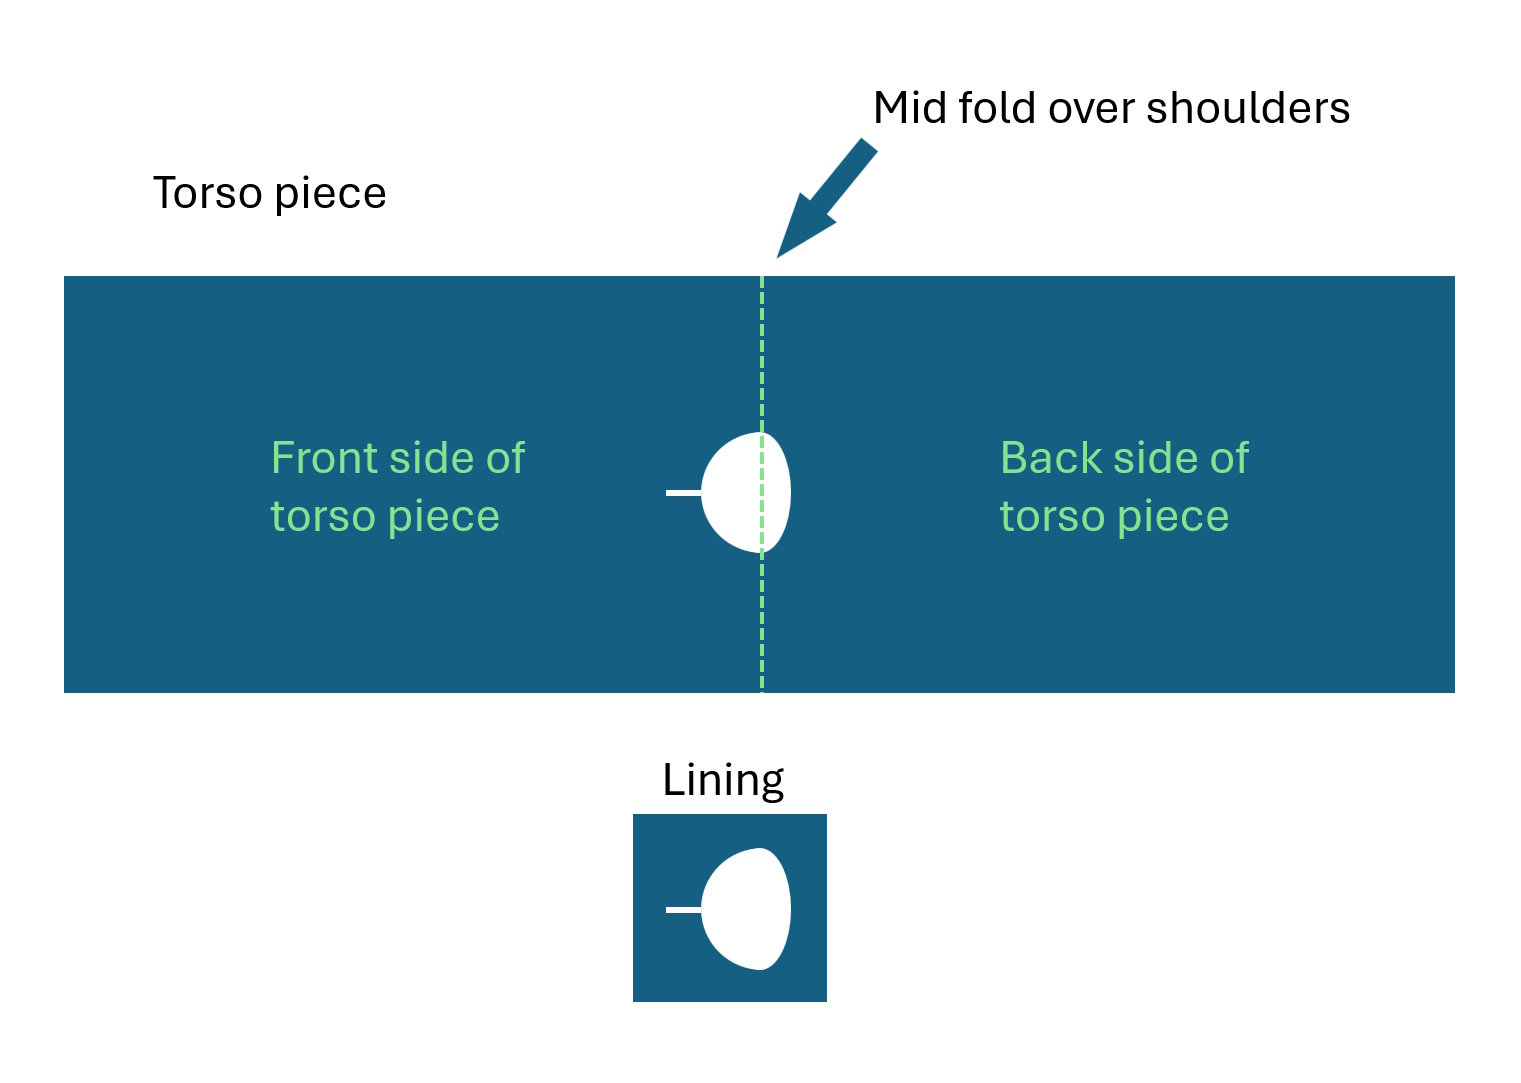
The most common mistake is to get a neck opening that has a narrow point over the sholder rather than a smooth round neck opening that is easy to apply the lining upon.
Hence, try to make sure you avoid sharp angles or sharp turns on the opening to make it easy to do the lining.
Of course an open pattern like this enables modifications. For example, if you have a long front slit in the neck opening you might want to have a button, or some strings to close it.
