Leather water flask
Background
Two decades ago I made a water flask in leather. I was very pleased with it, but after a while it had become ugly from me carrying it around. I'd heard that you could put it in the owen at low temperature to get a nice looking surface again, and tried that. Unfortunately I forgot it a few hours in the owen. When I finally opened the owen it had shrunk, crumbled and became rock hard. Now it's time to make a new one, with decoration this time, and the proecess is documented below.

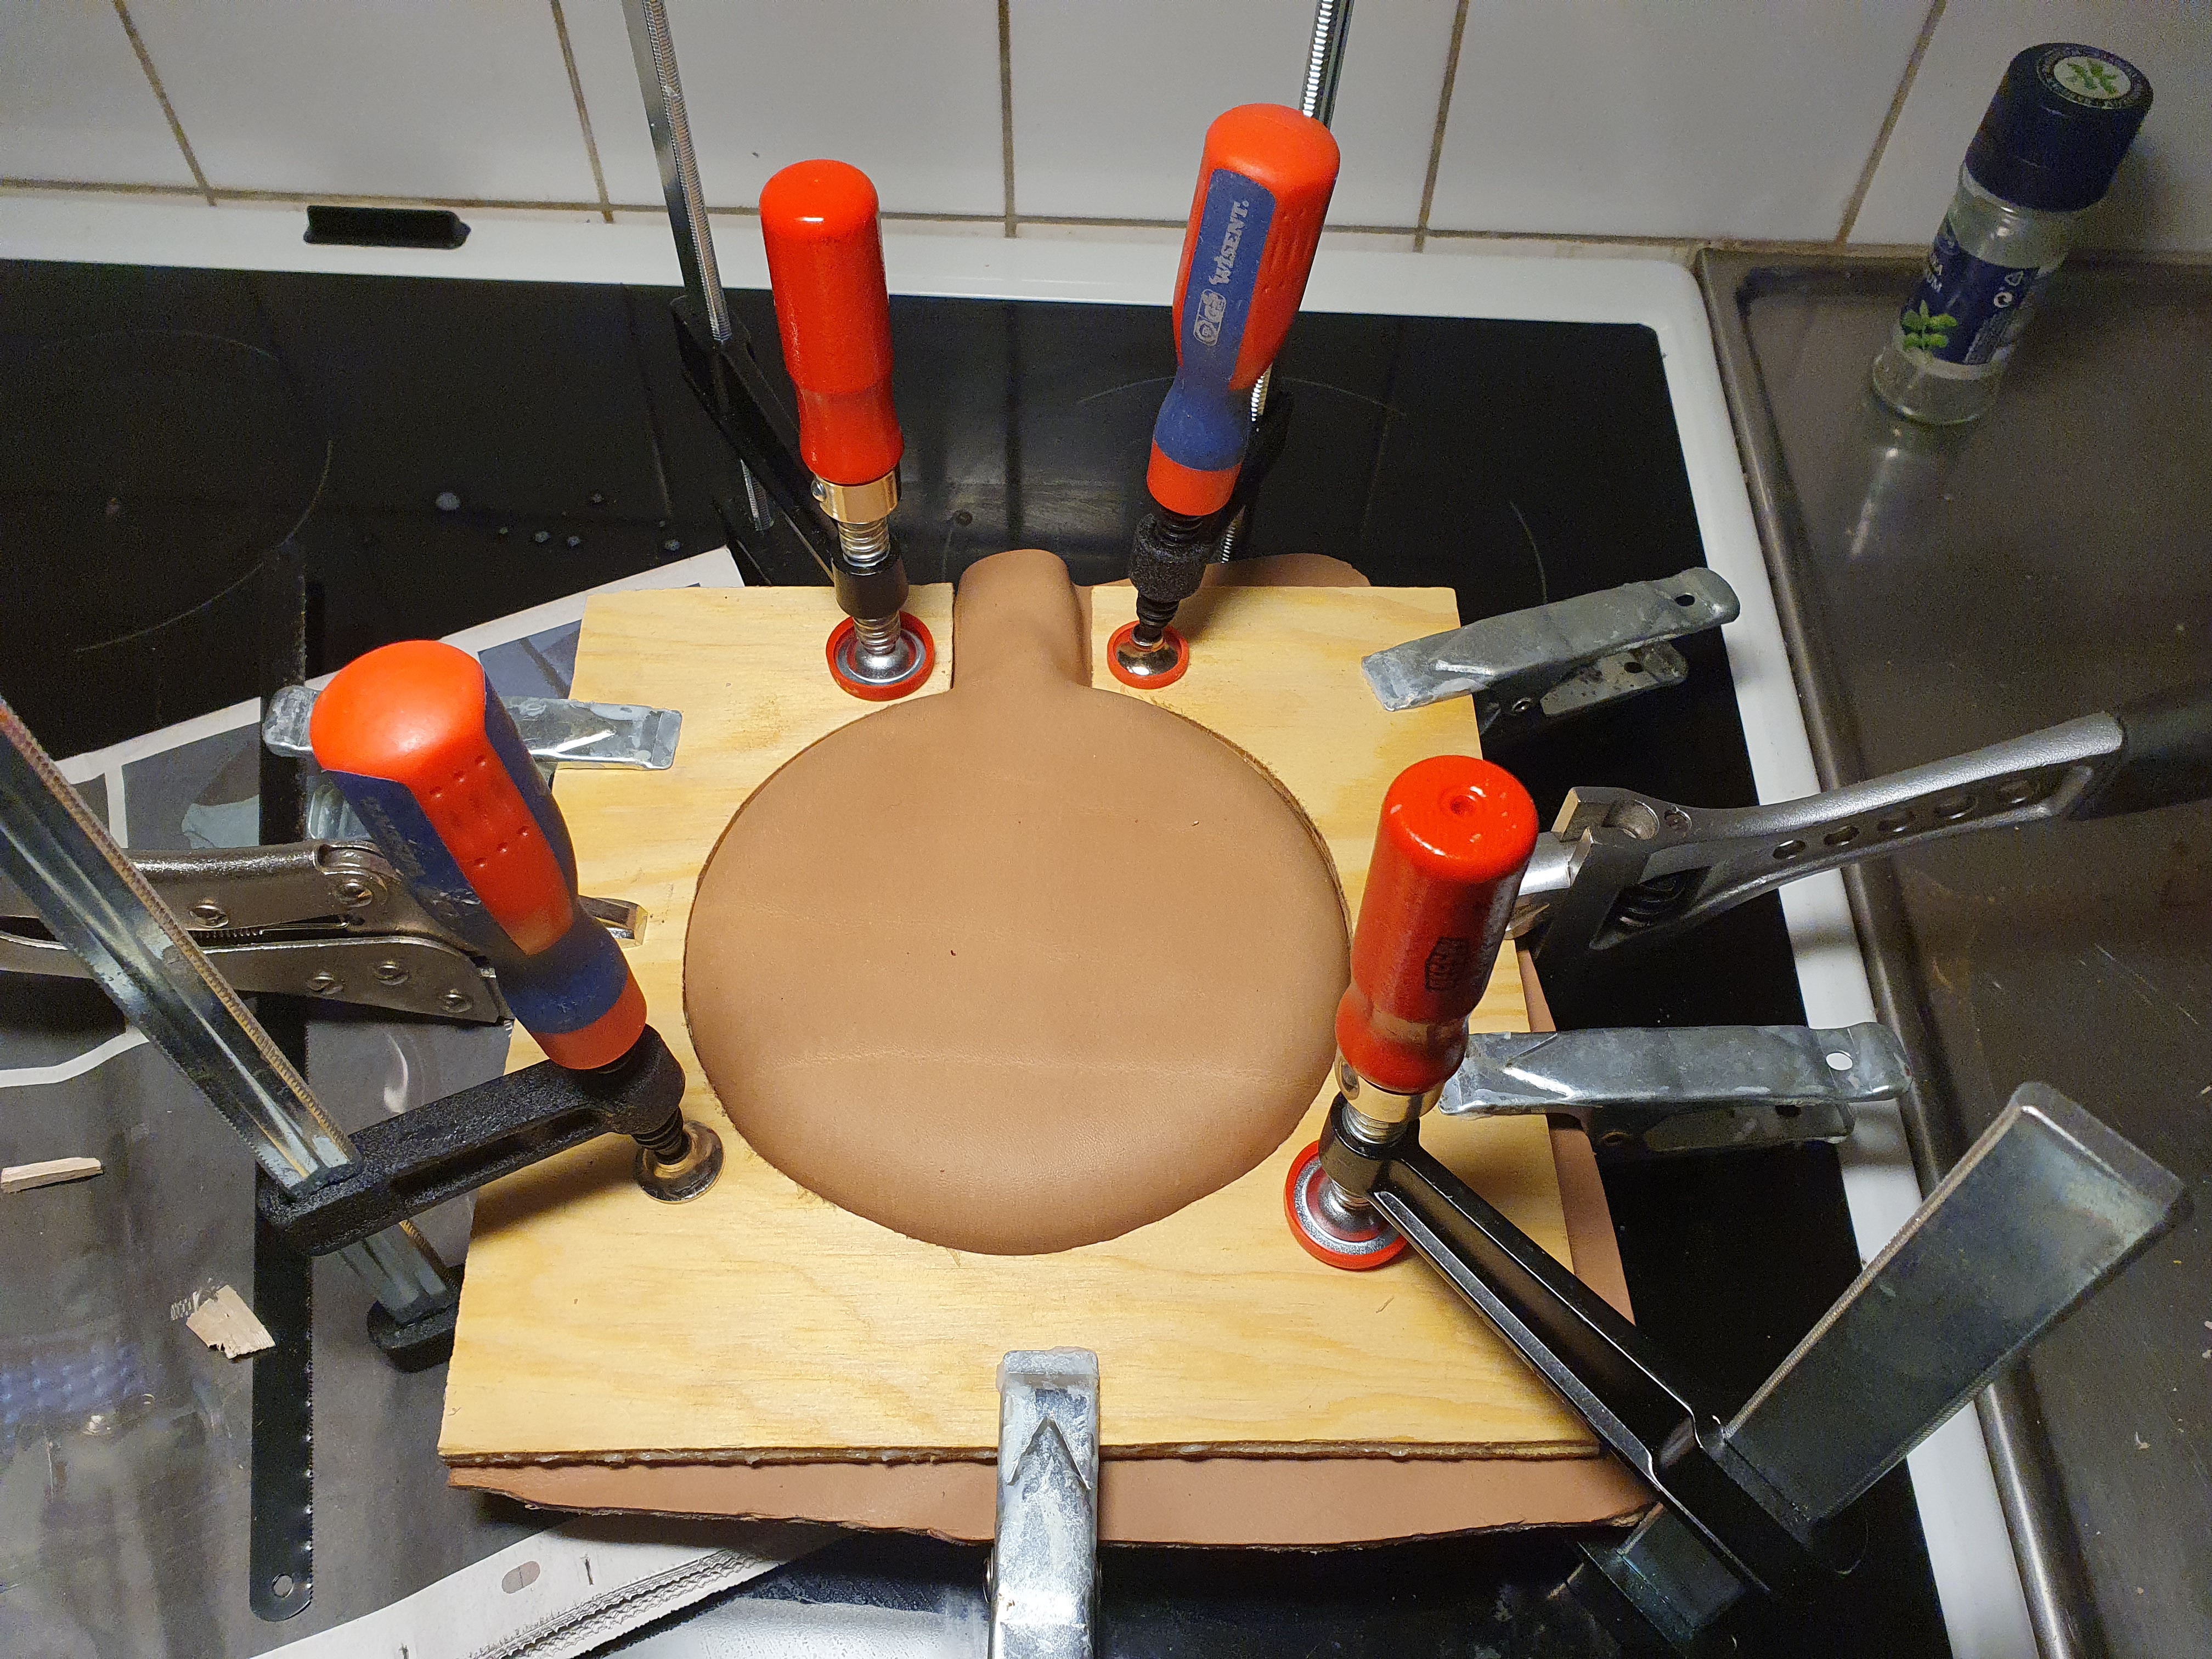
Testing out the frame I made
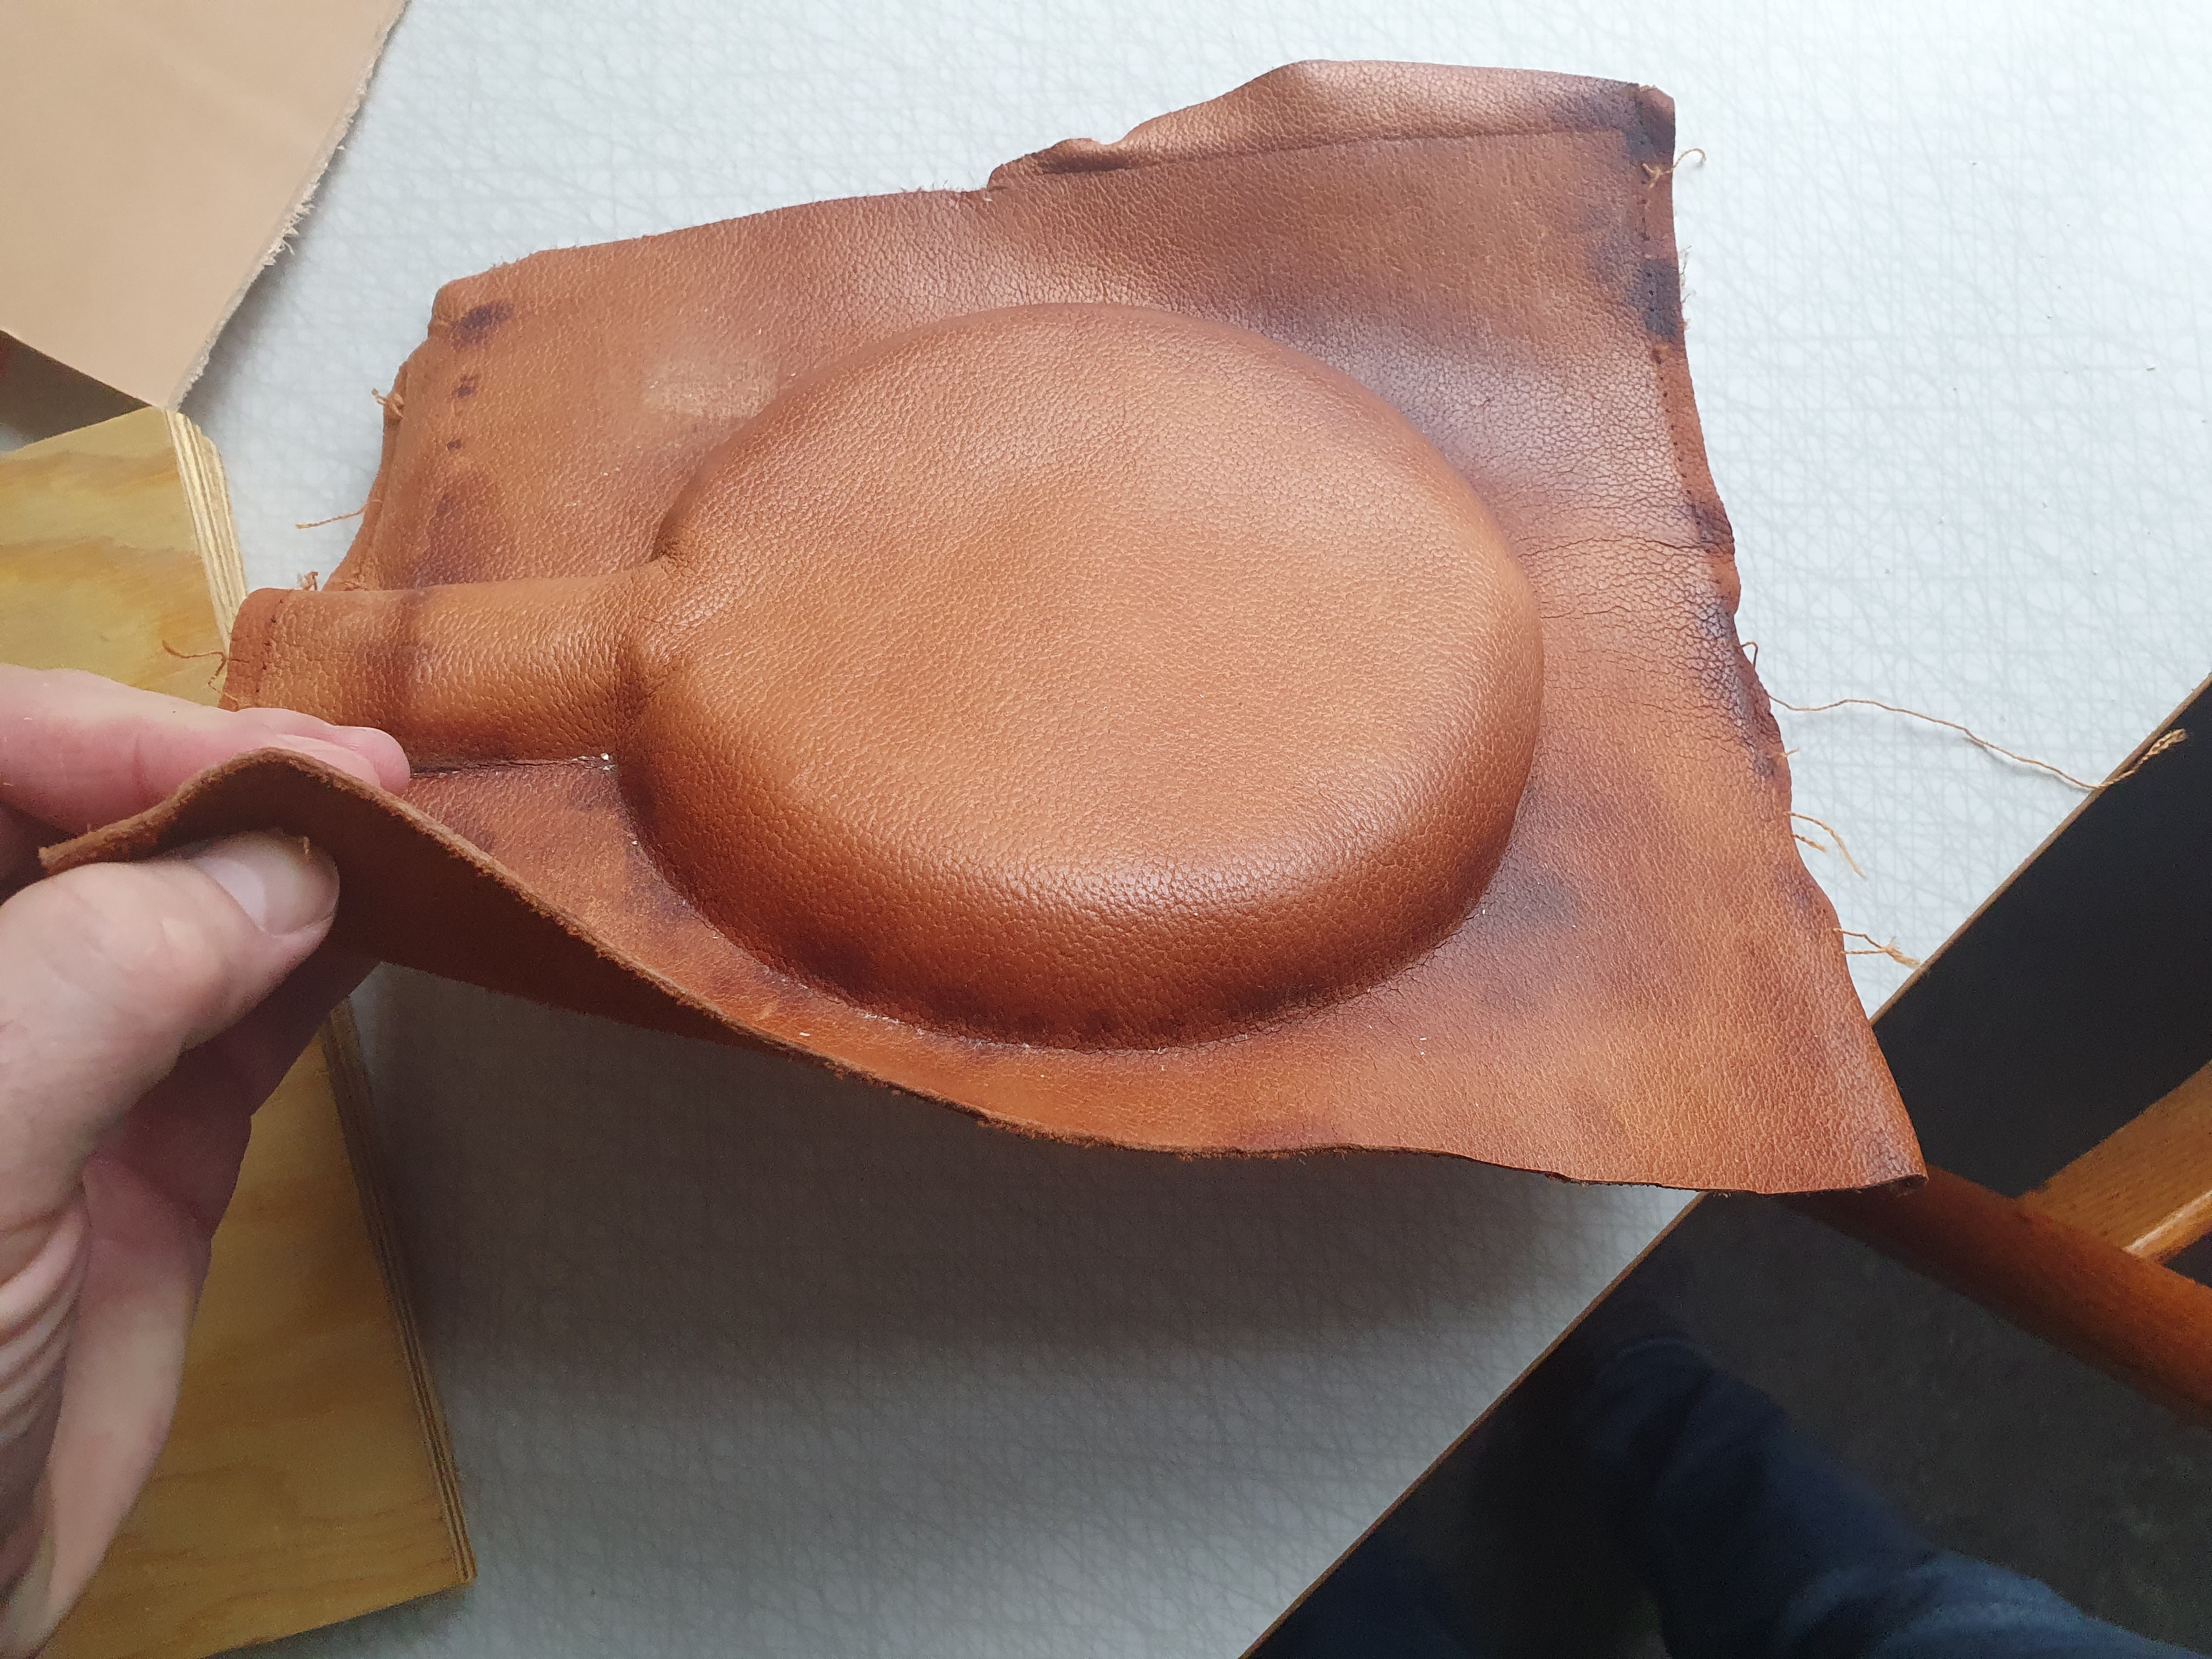
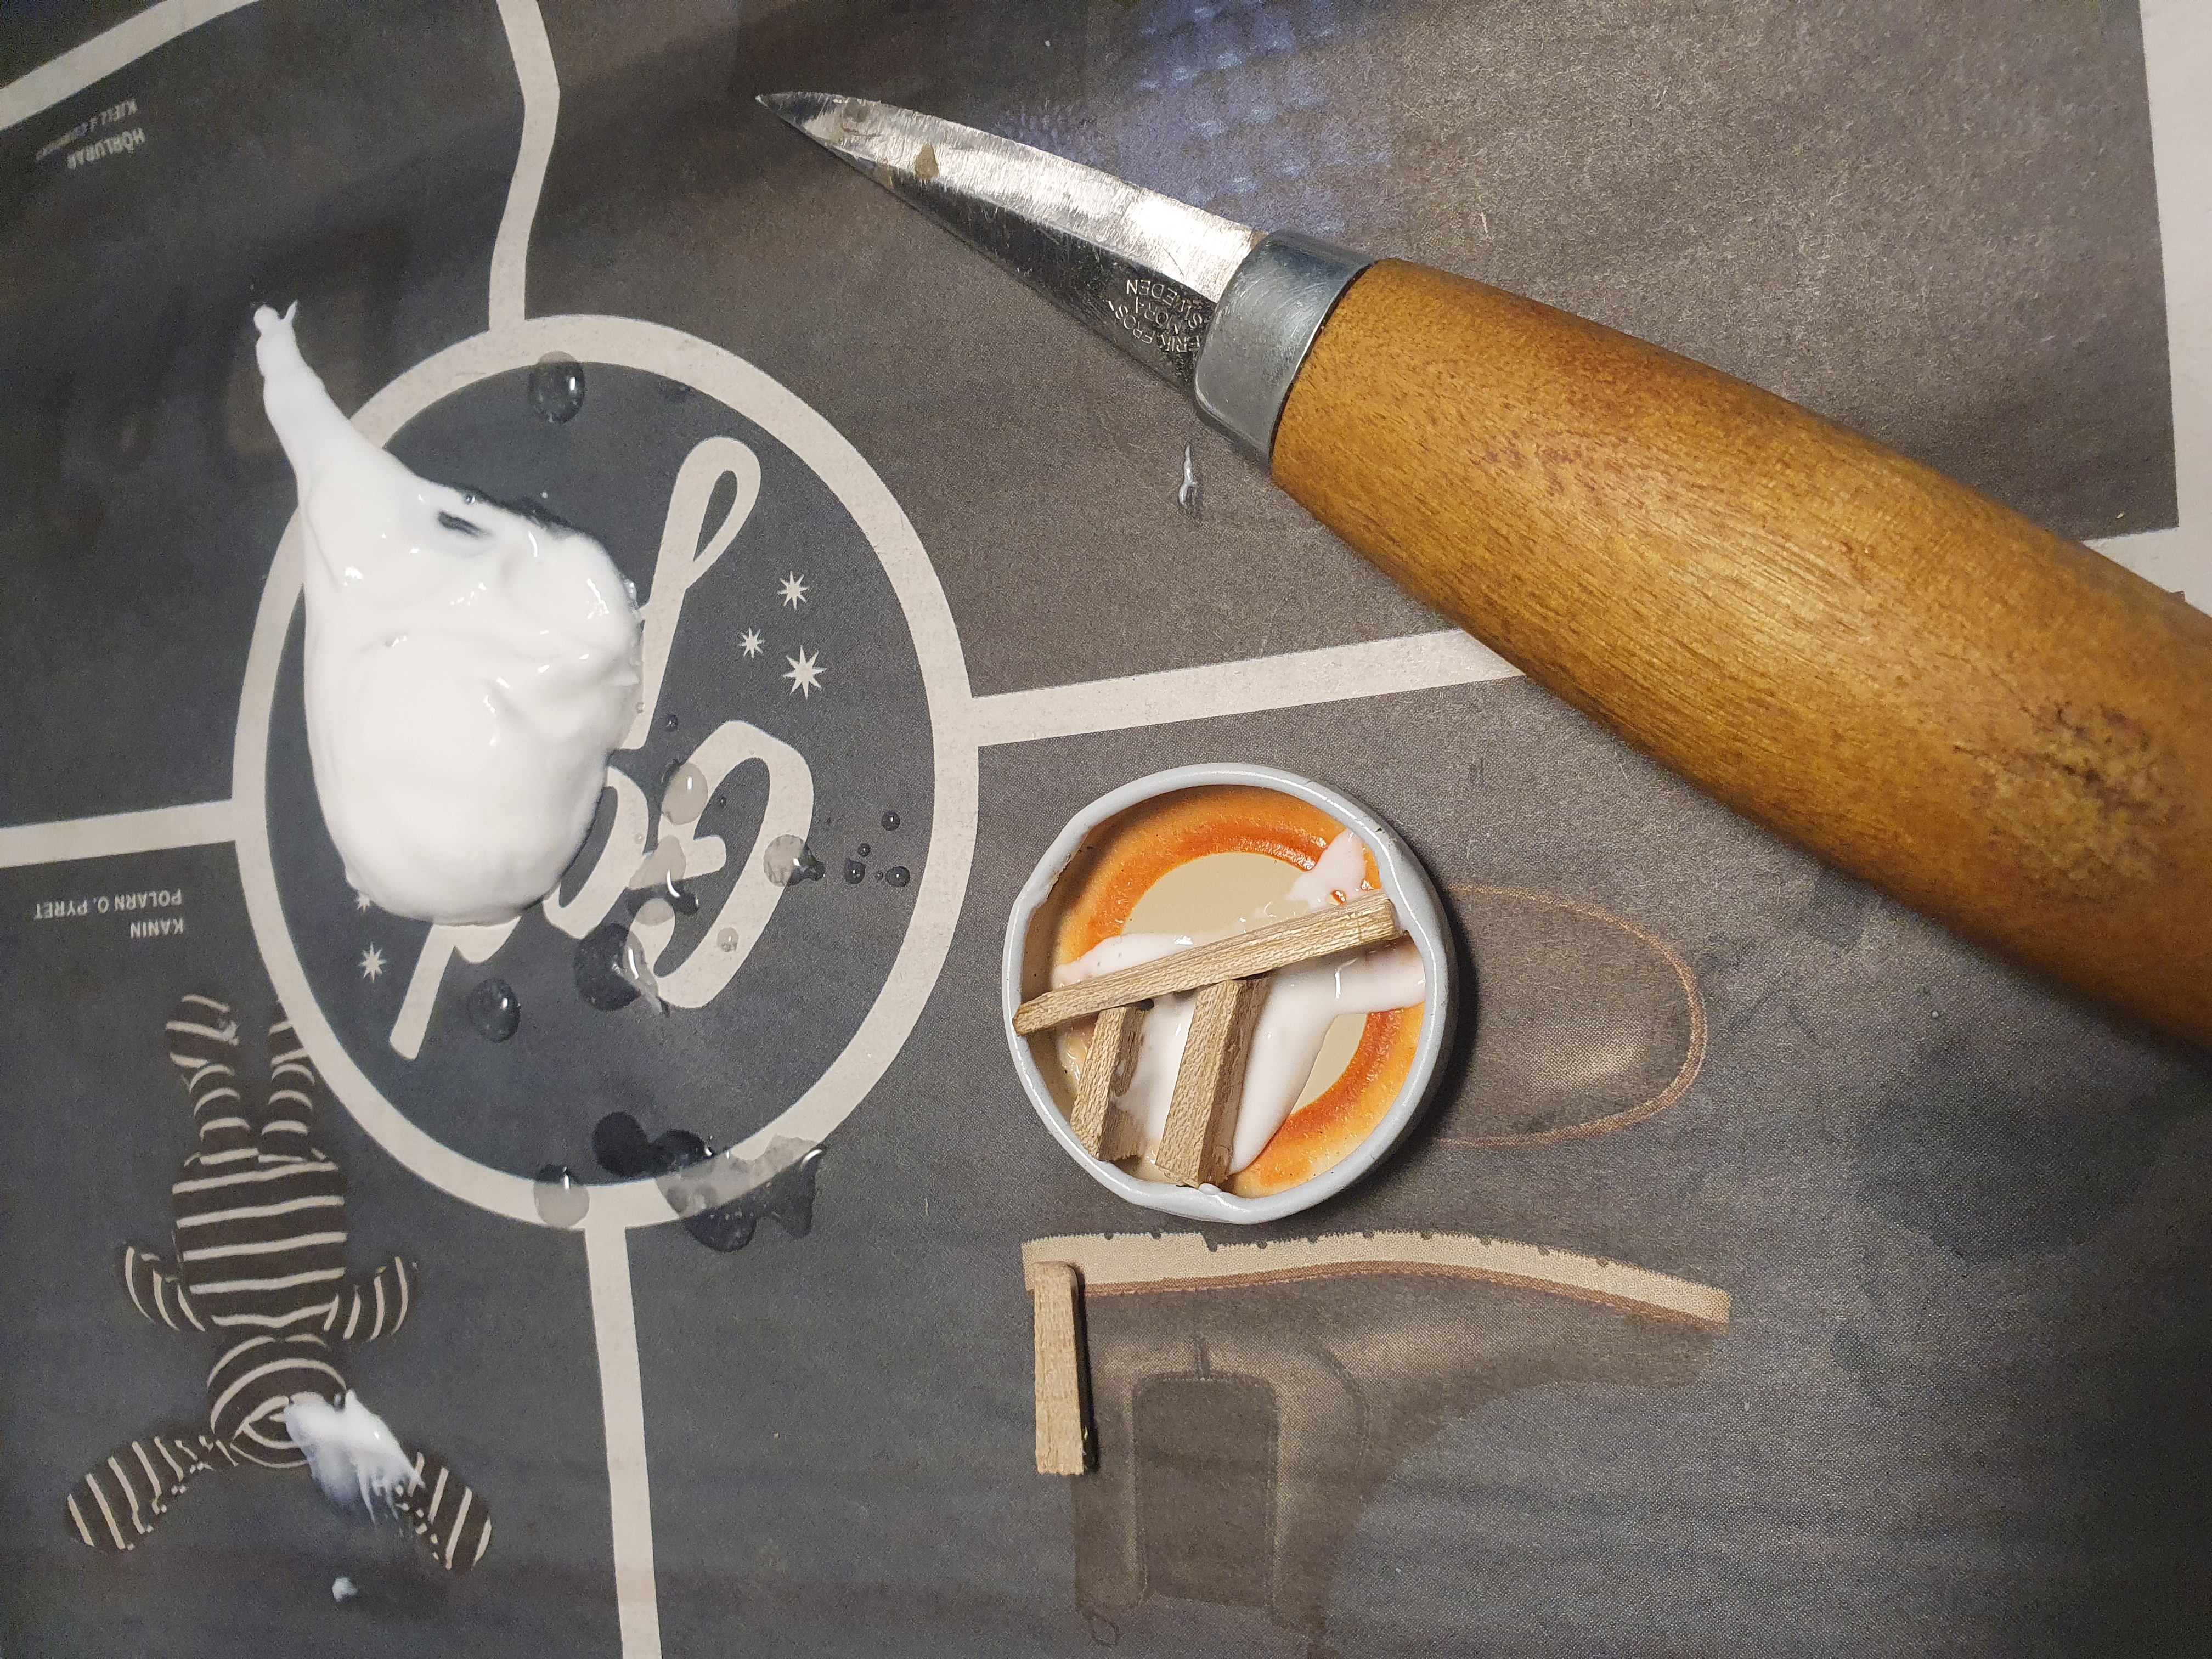
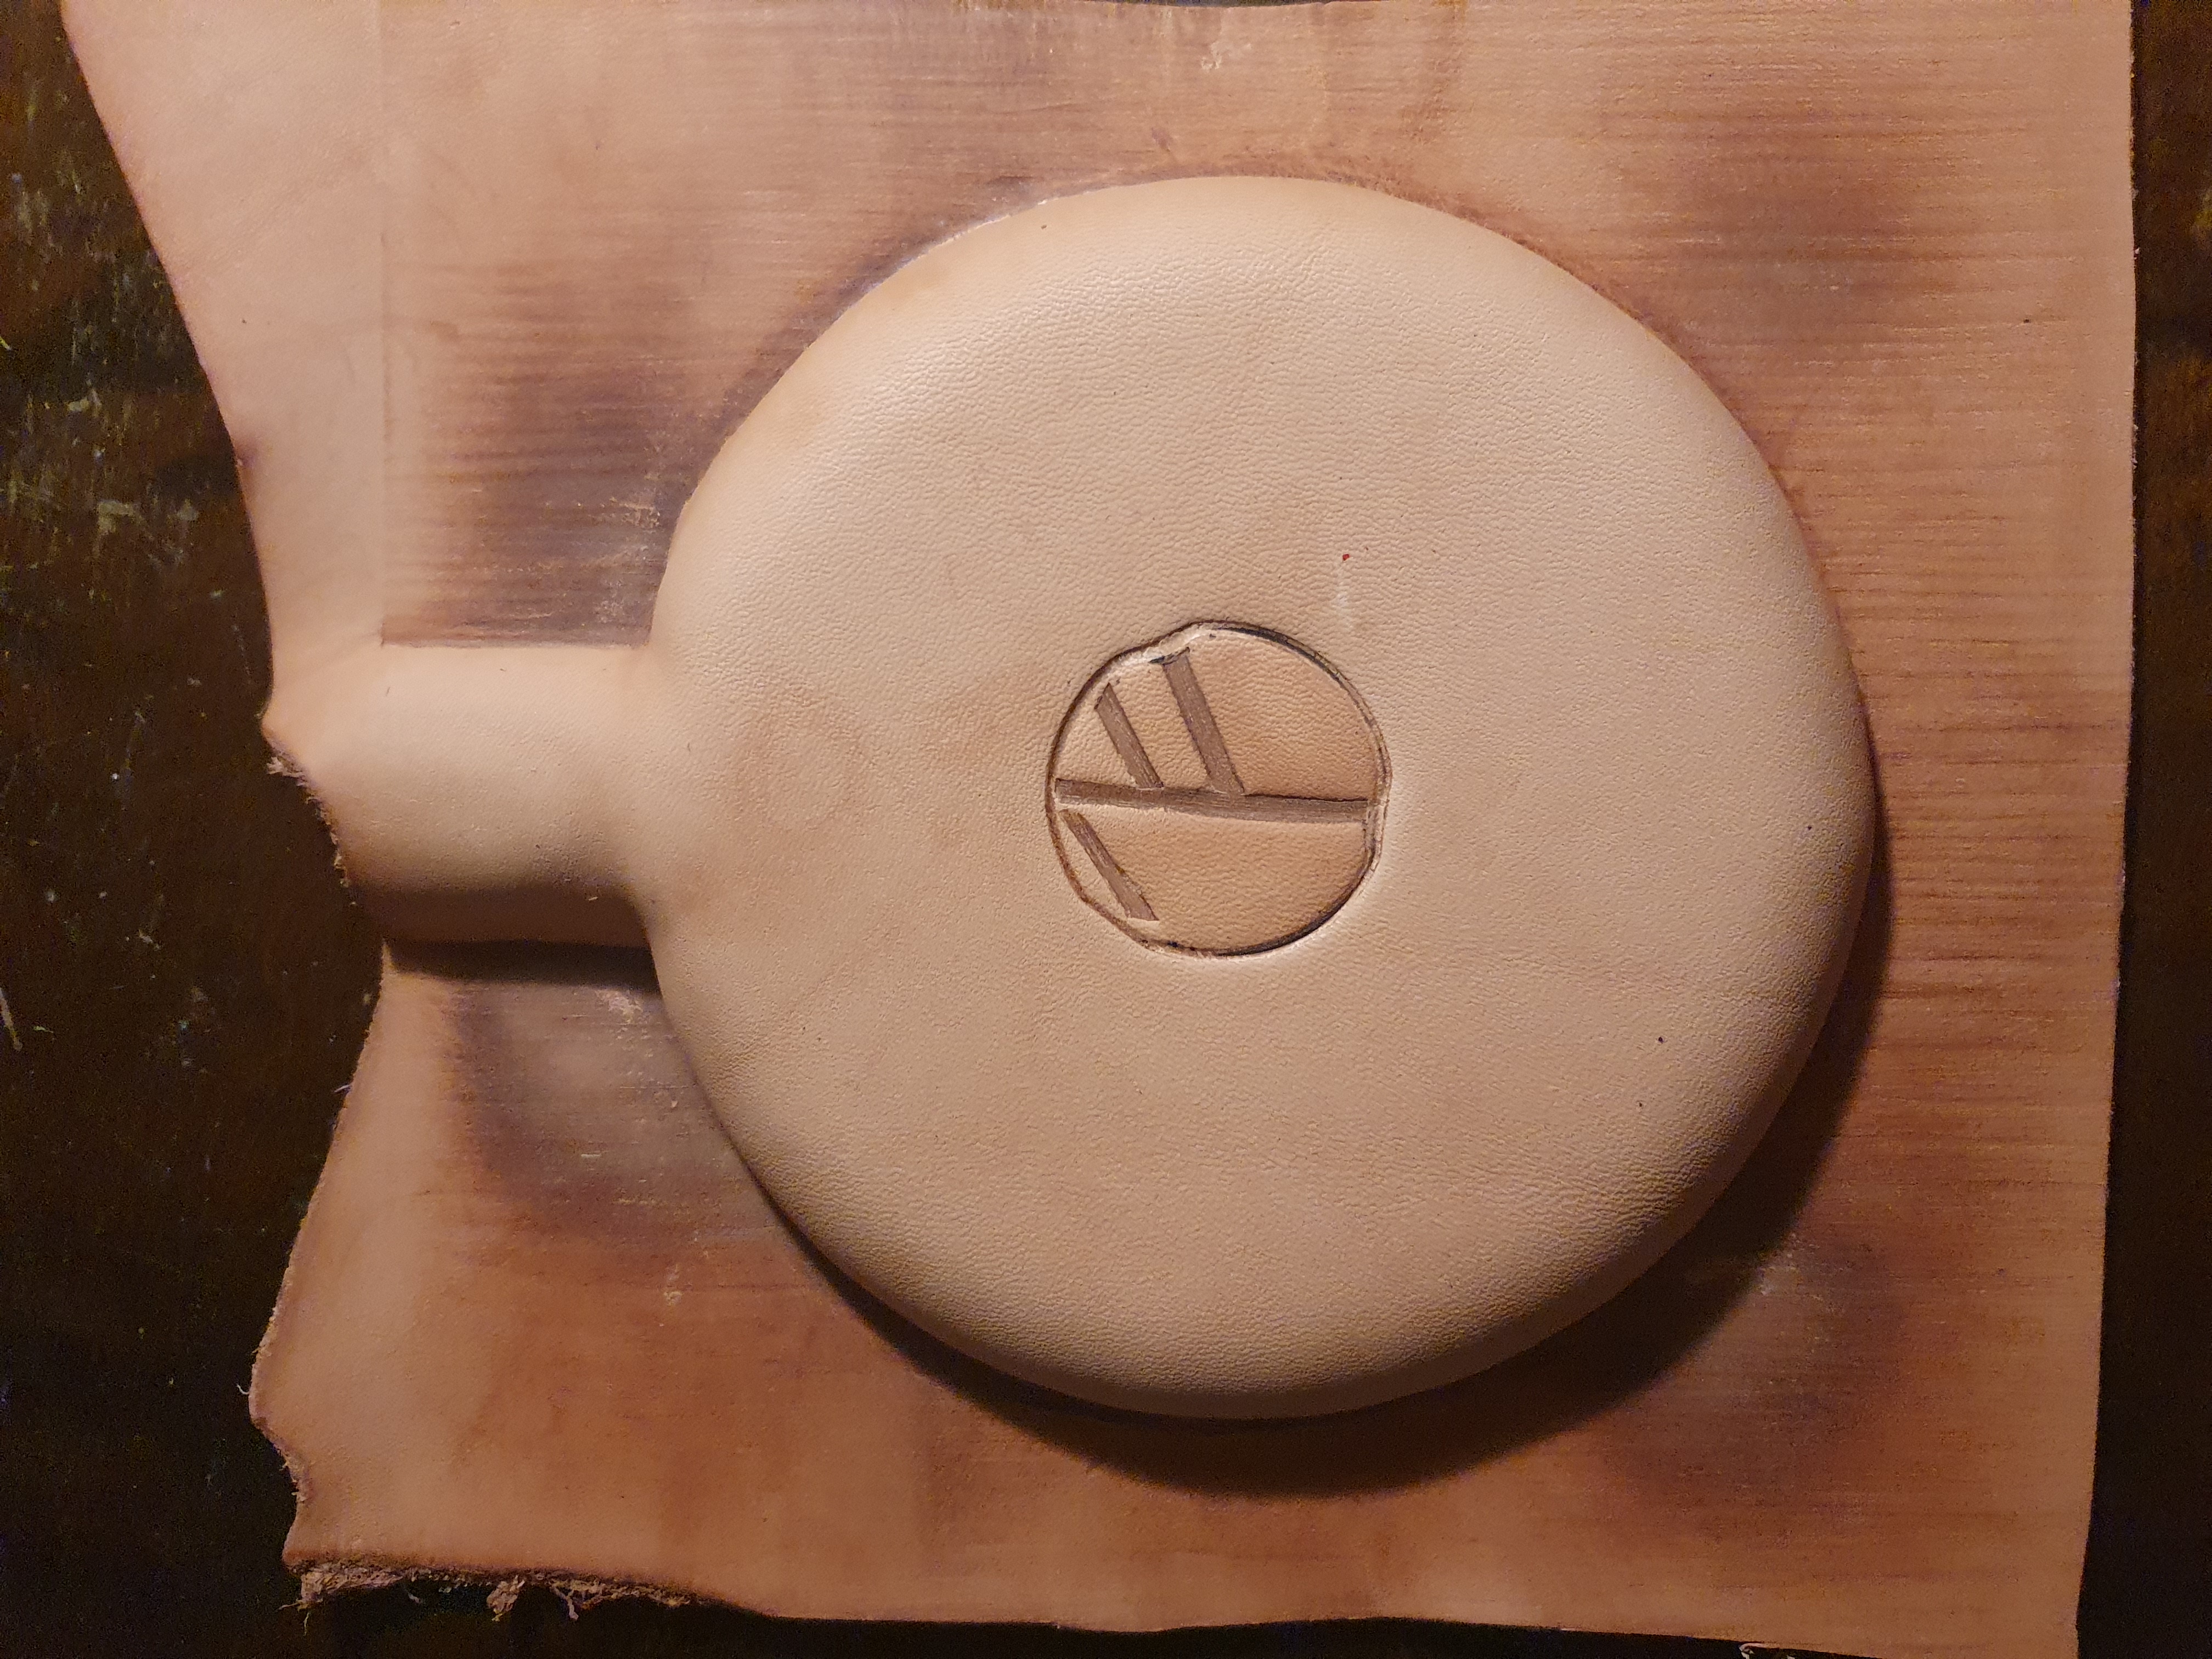
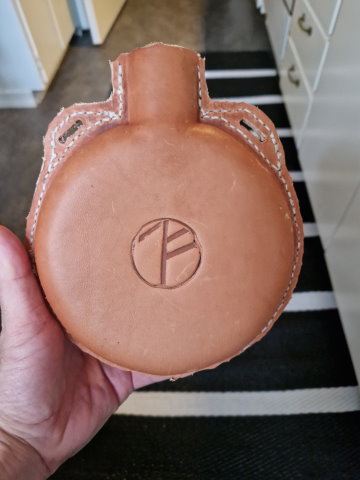
Putting my mark in the leather
To create my mark in something that could press into the soaked leather I used a lid from a jar and some thin pieces of wood glued to it.


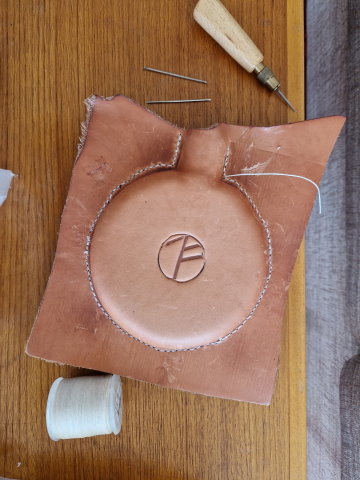
Sewing the sides together


Sewing carrying strap loops
To make the loops for the carrying strap more sturdy, and avoid the two pieces of leather from splitting, an additional stitch around the intended carryin strap loops were made.
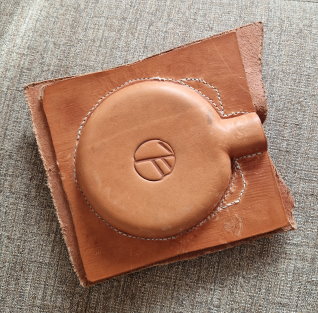
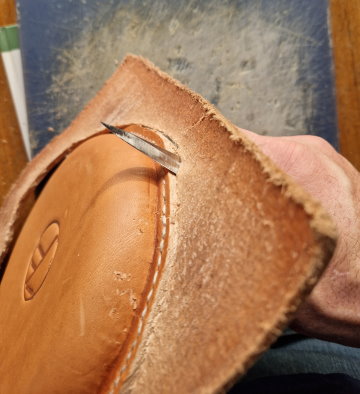
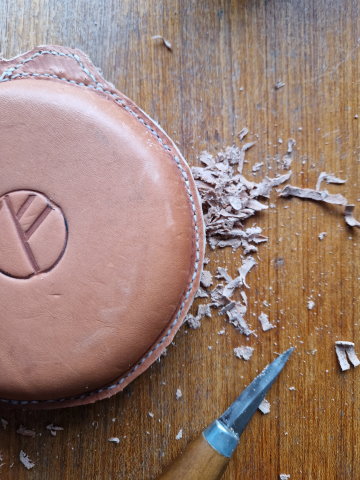
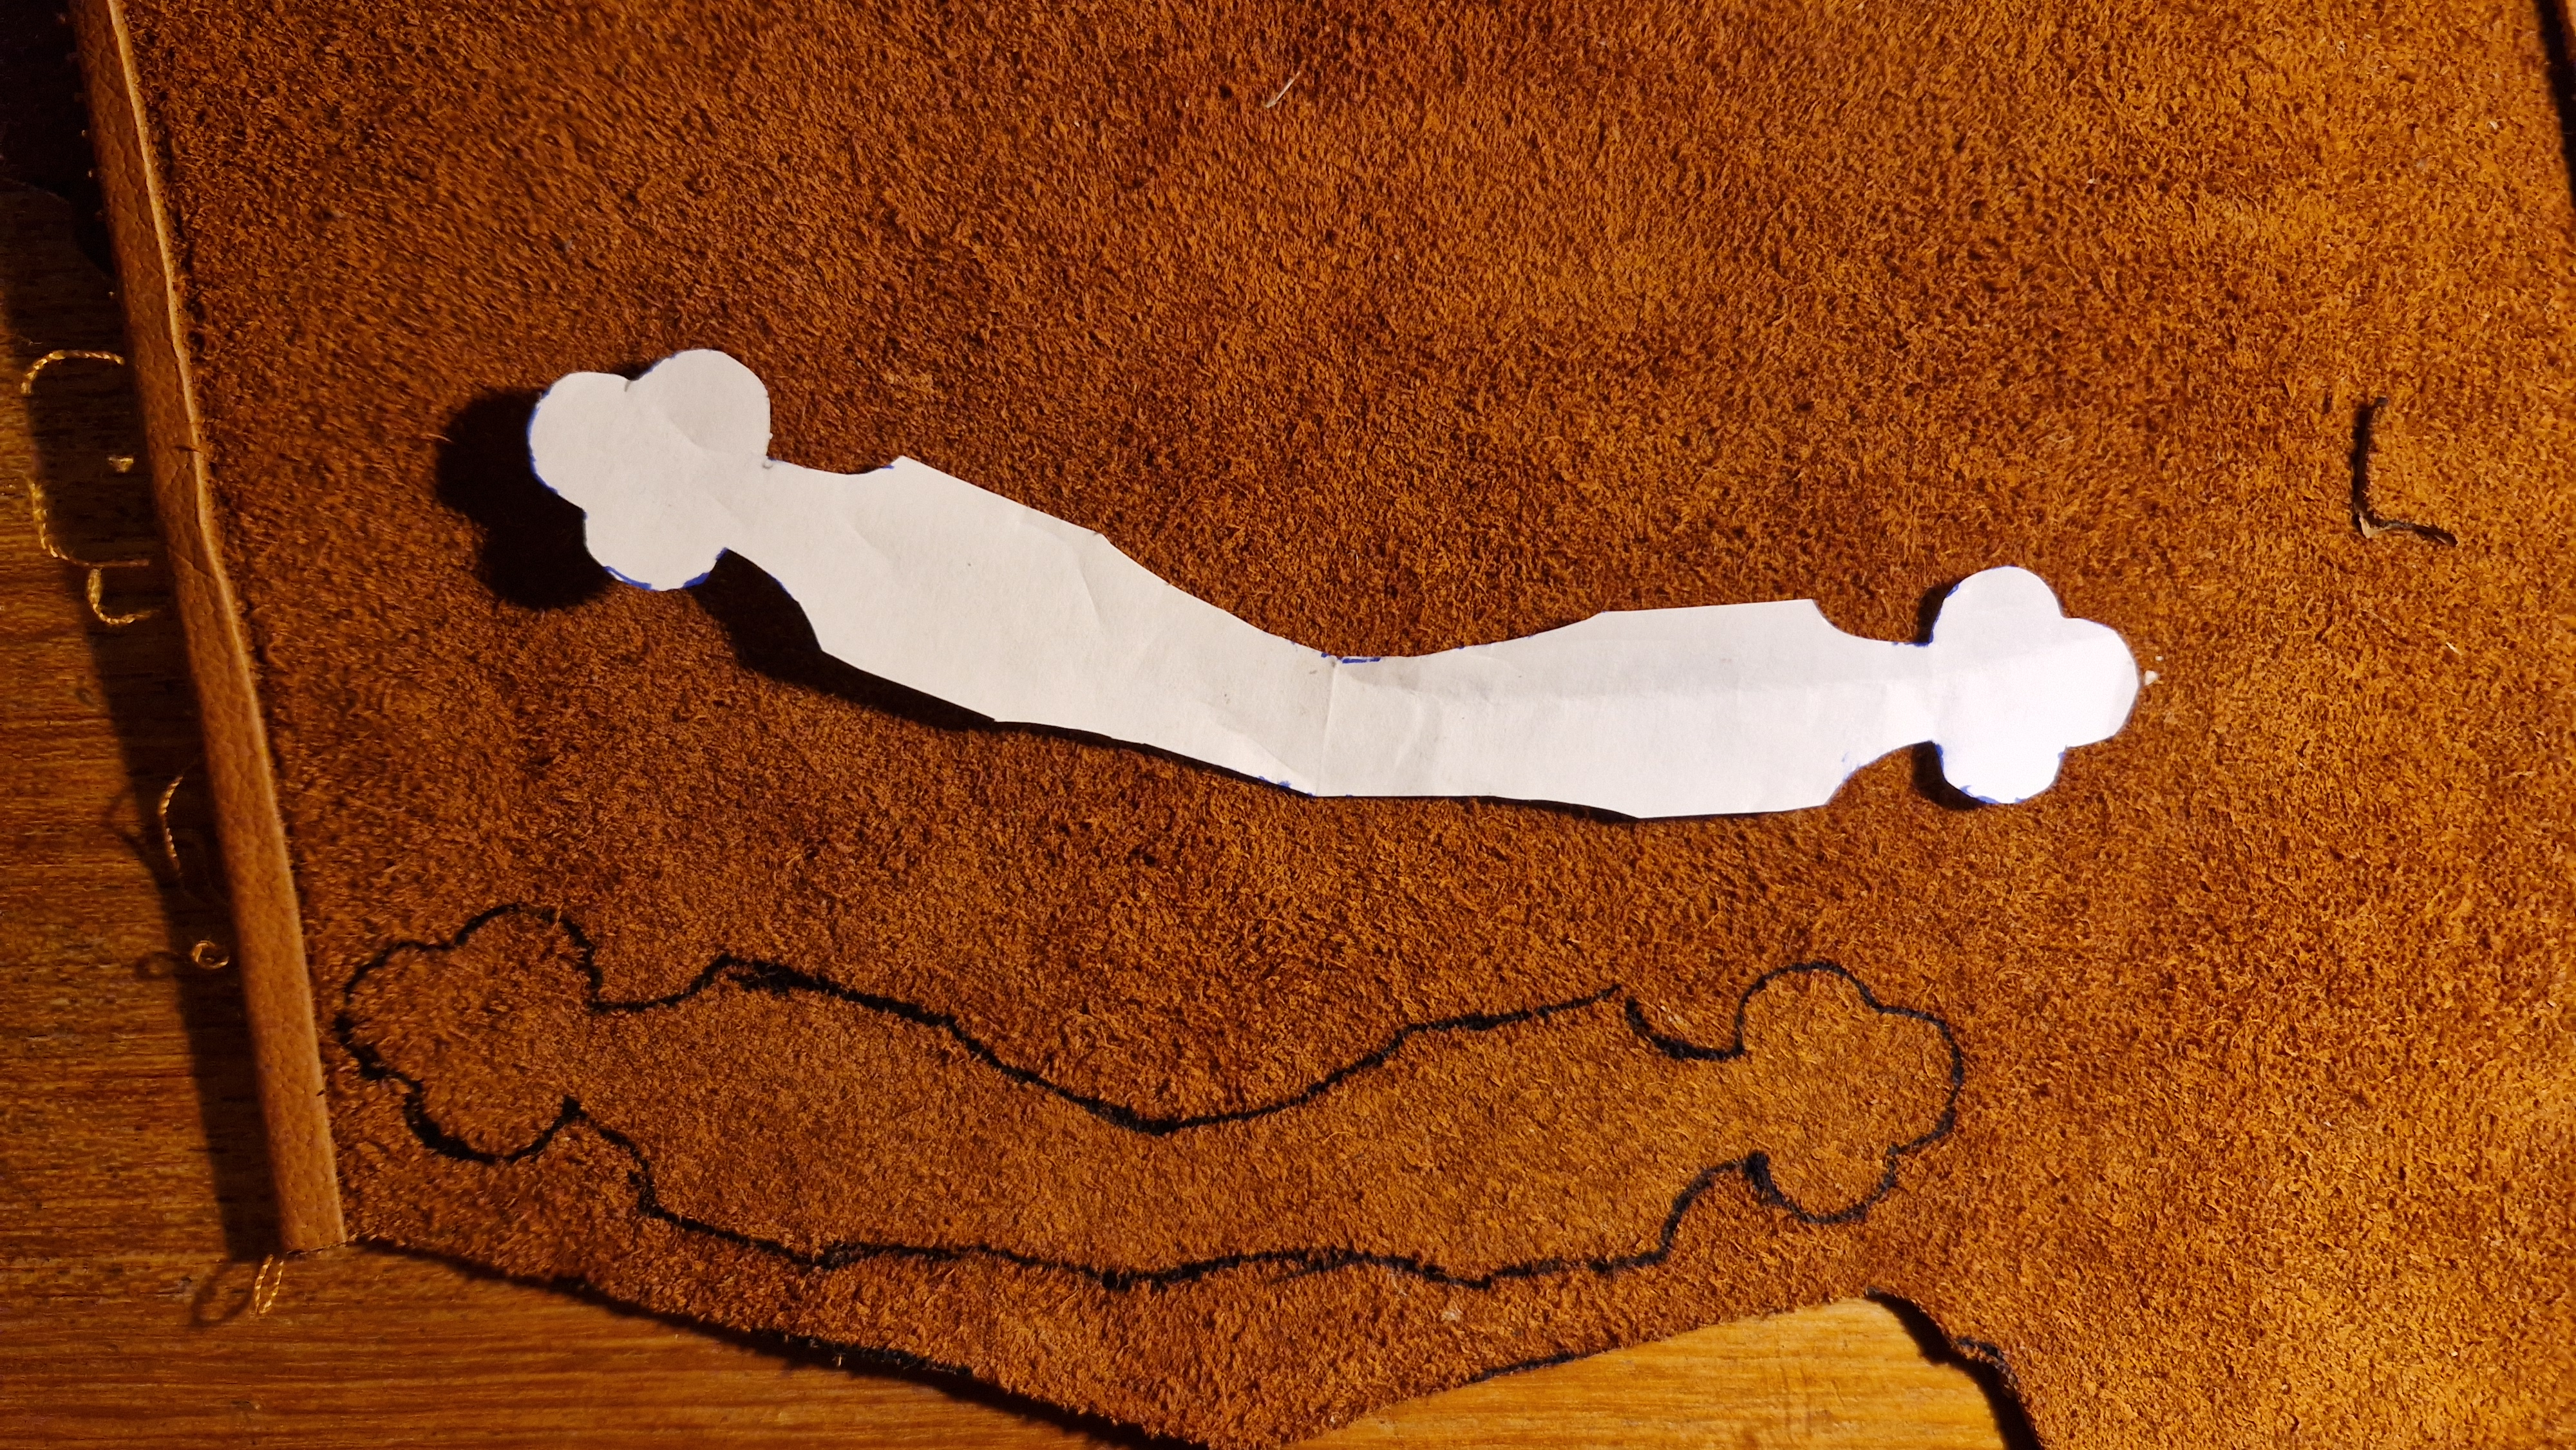
Cutting it out
Excess leather was removed using a knife. After the inital trimming, more fine trimming was made. Carving in leather this thick is very similar to cutting wood, in the way you do it, and in the way you'll have to think about fiber direction.

Making the carrying strap loops
Cutting out the loops for the carrying strap could be done in all kinds of ways. I choosed to use a hole making plier for smooth holes, and then cutting away the material between the holes with the help of a chisel.

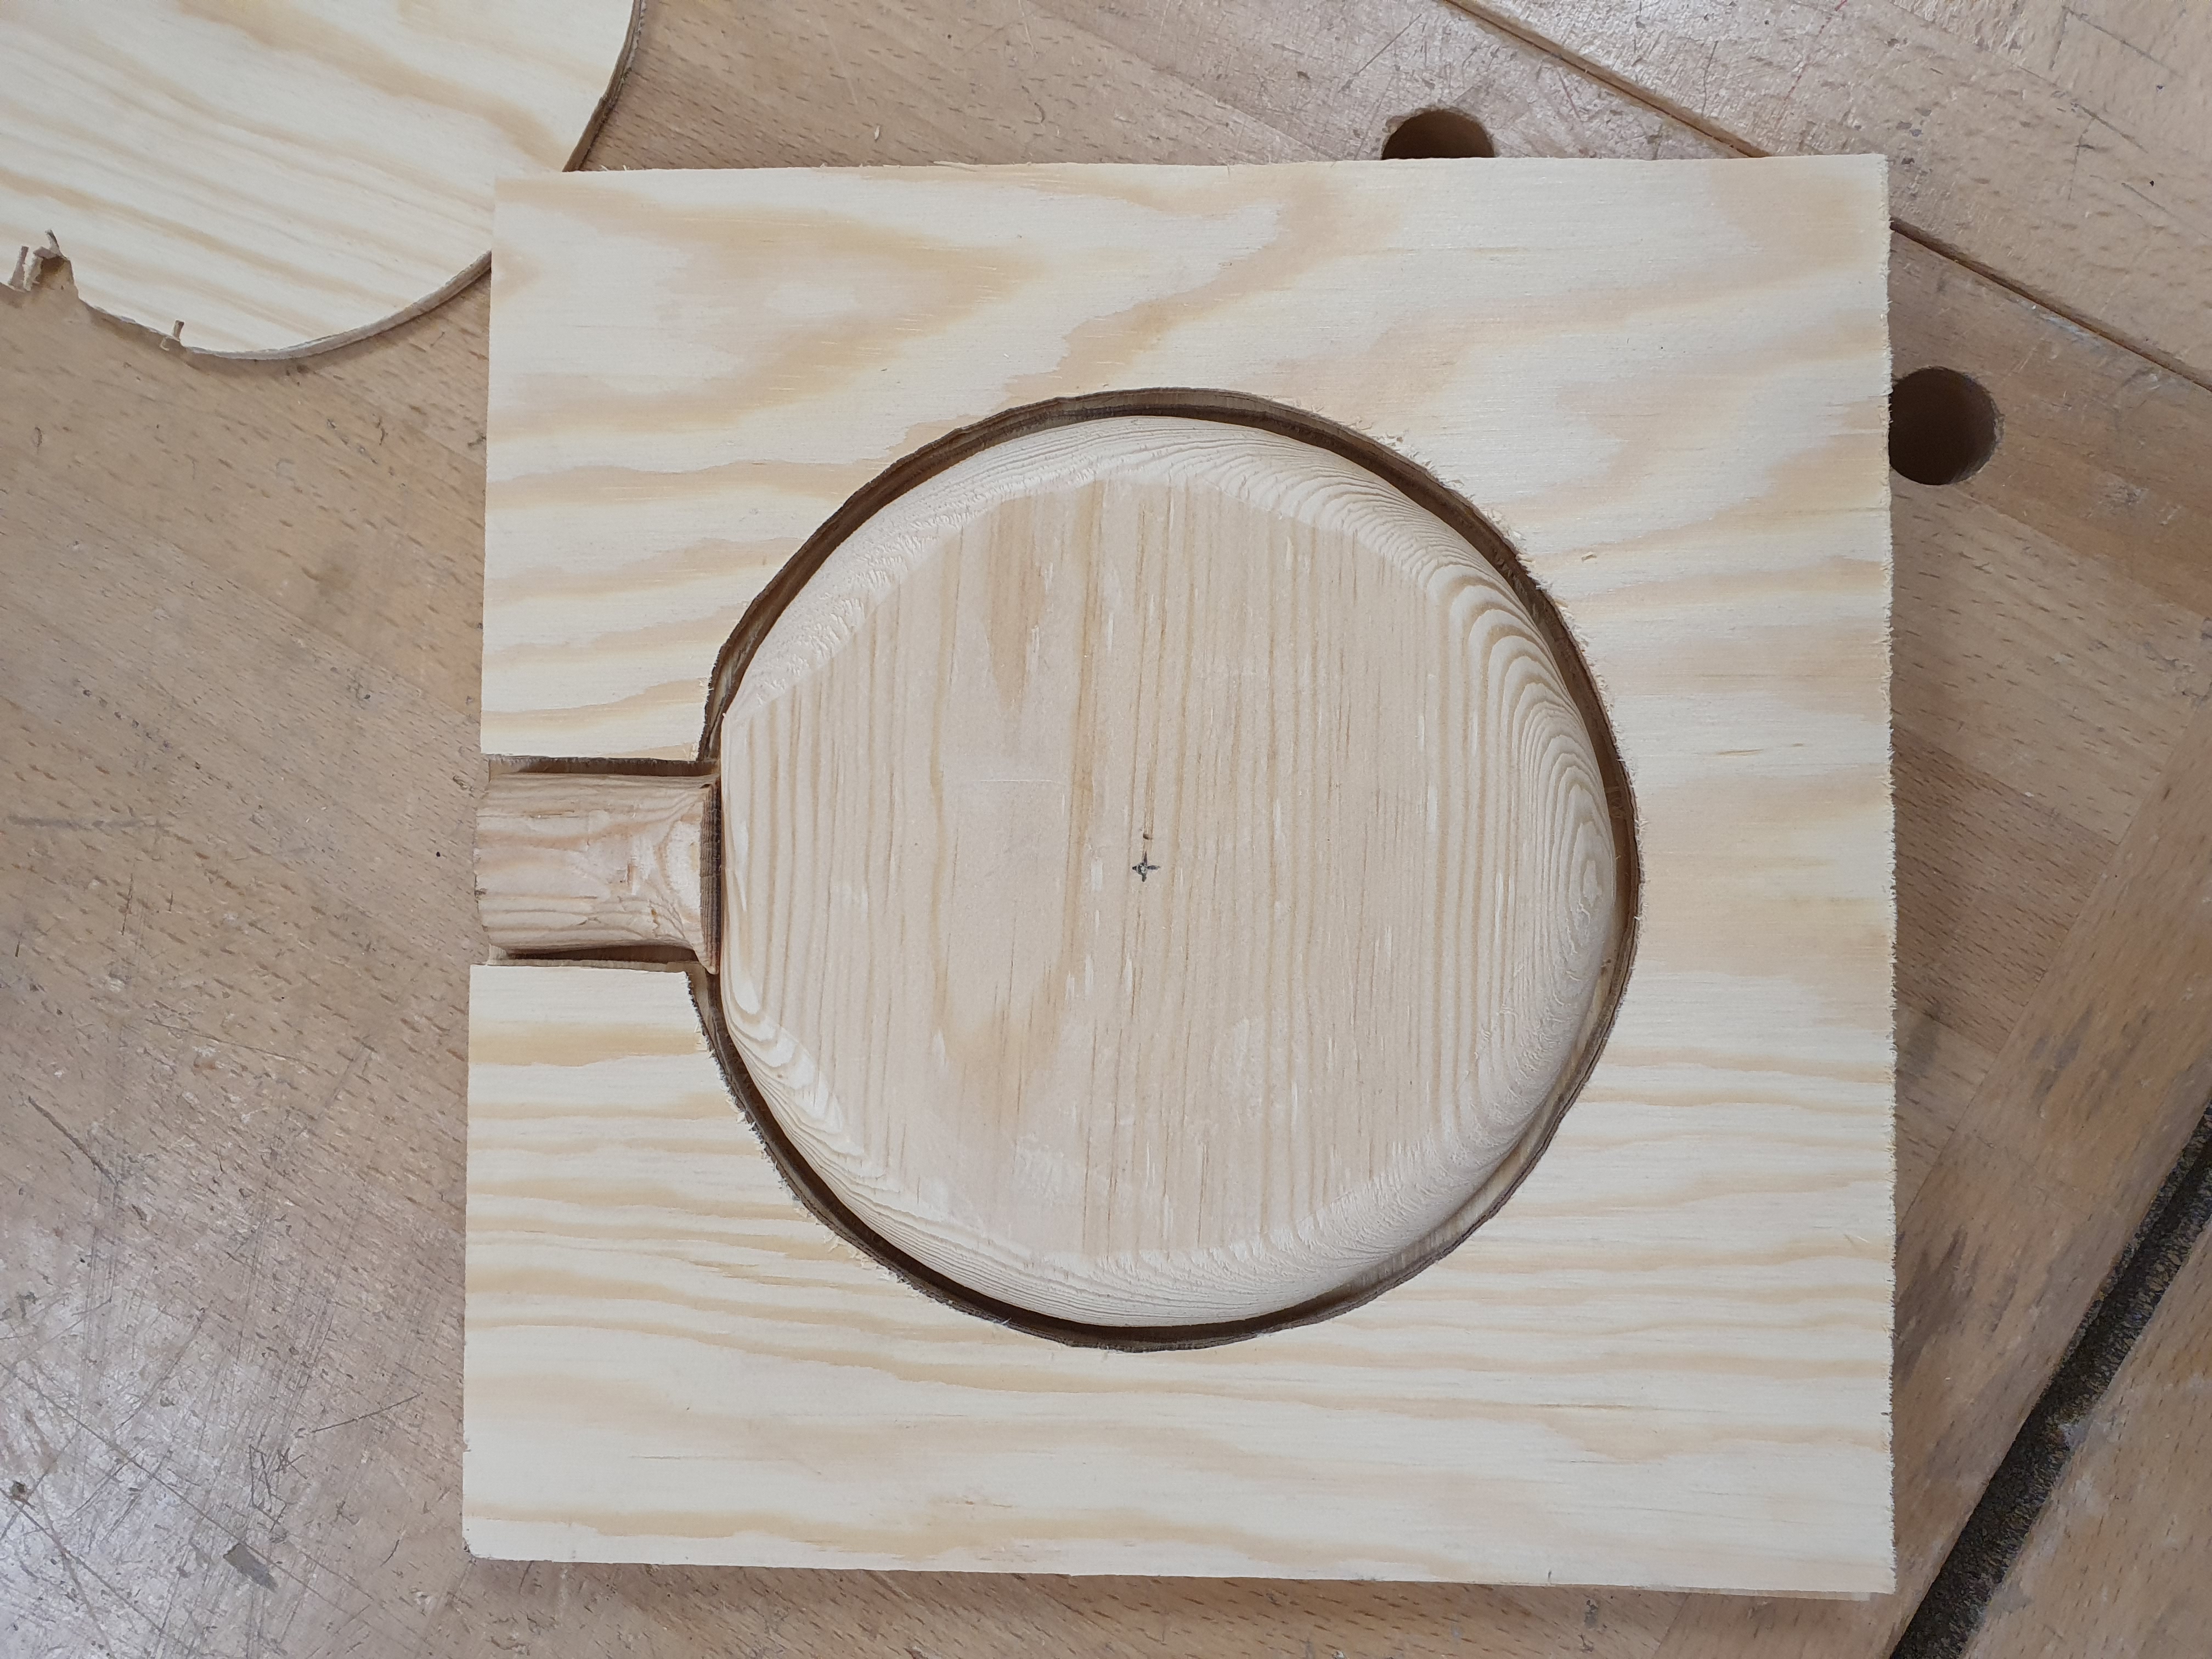
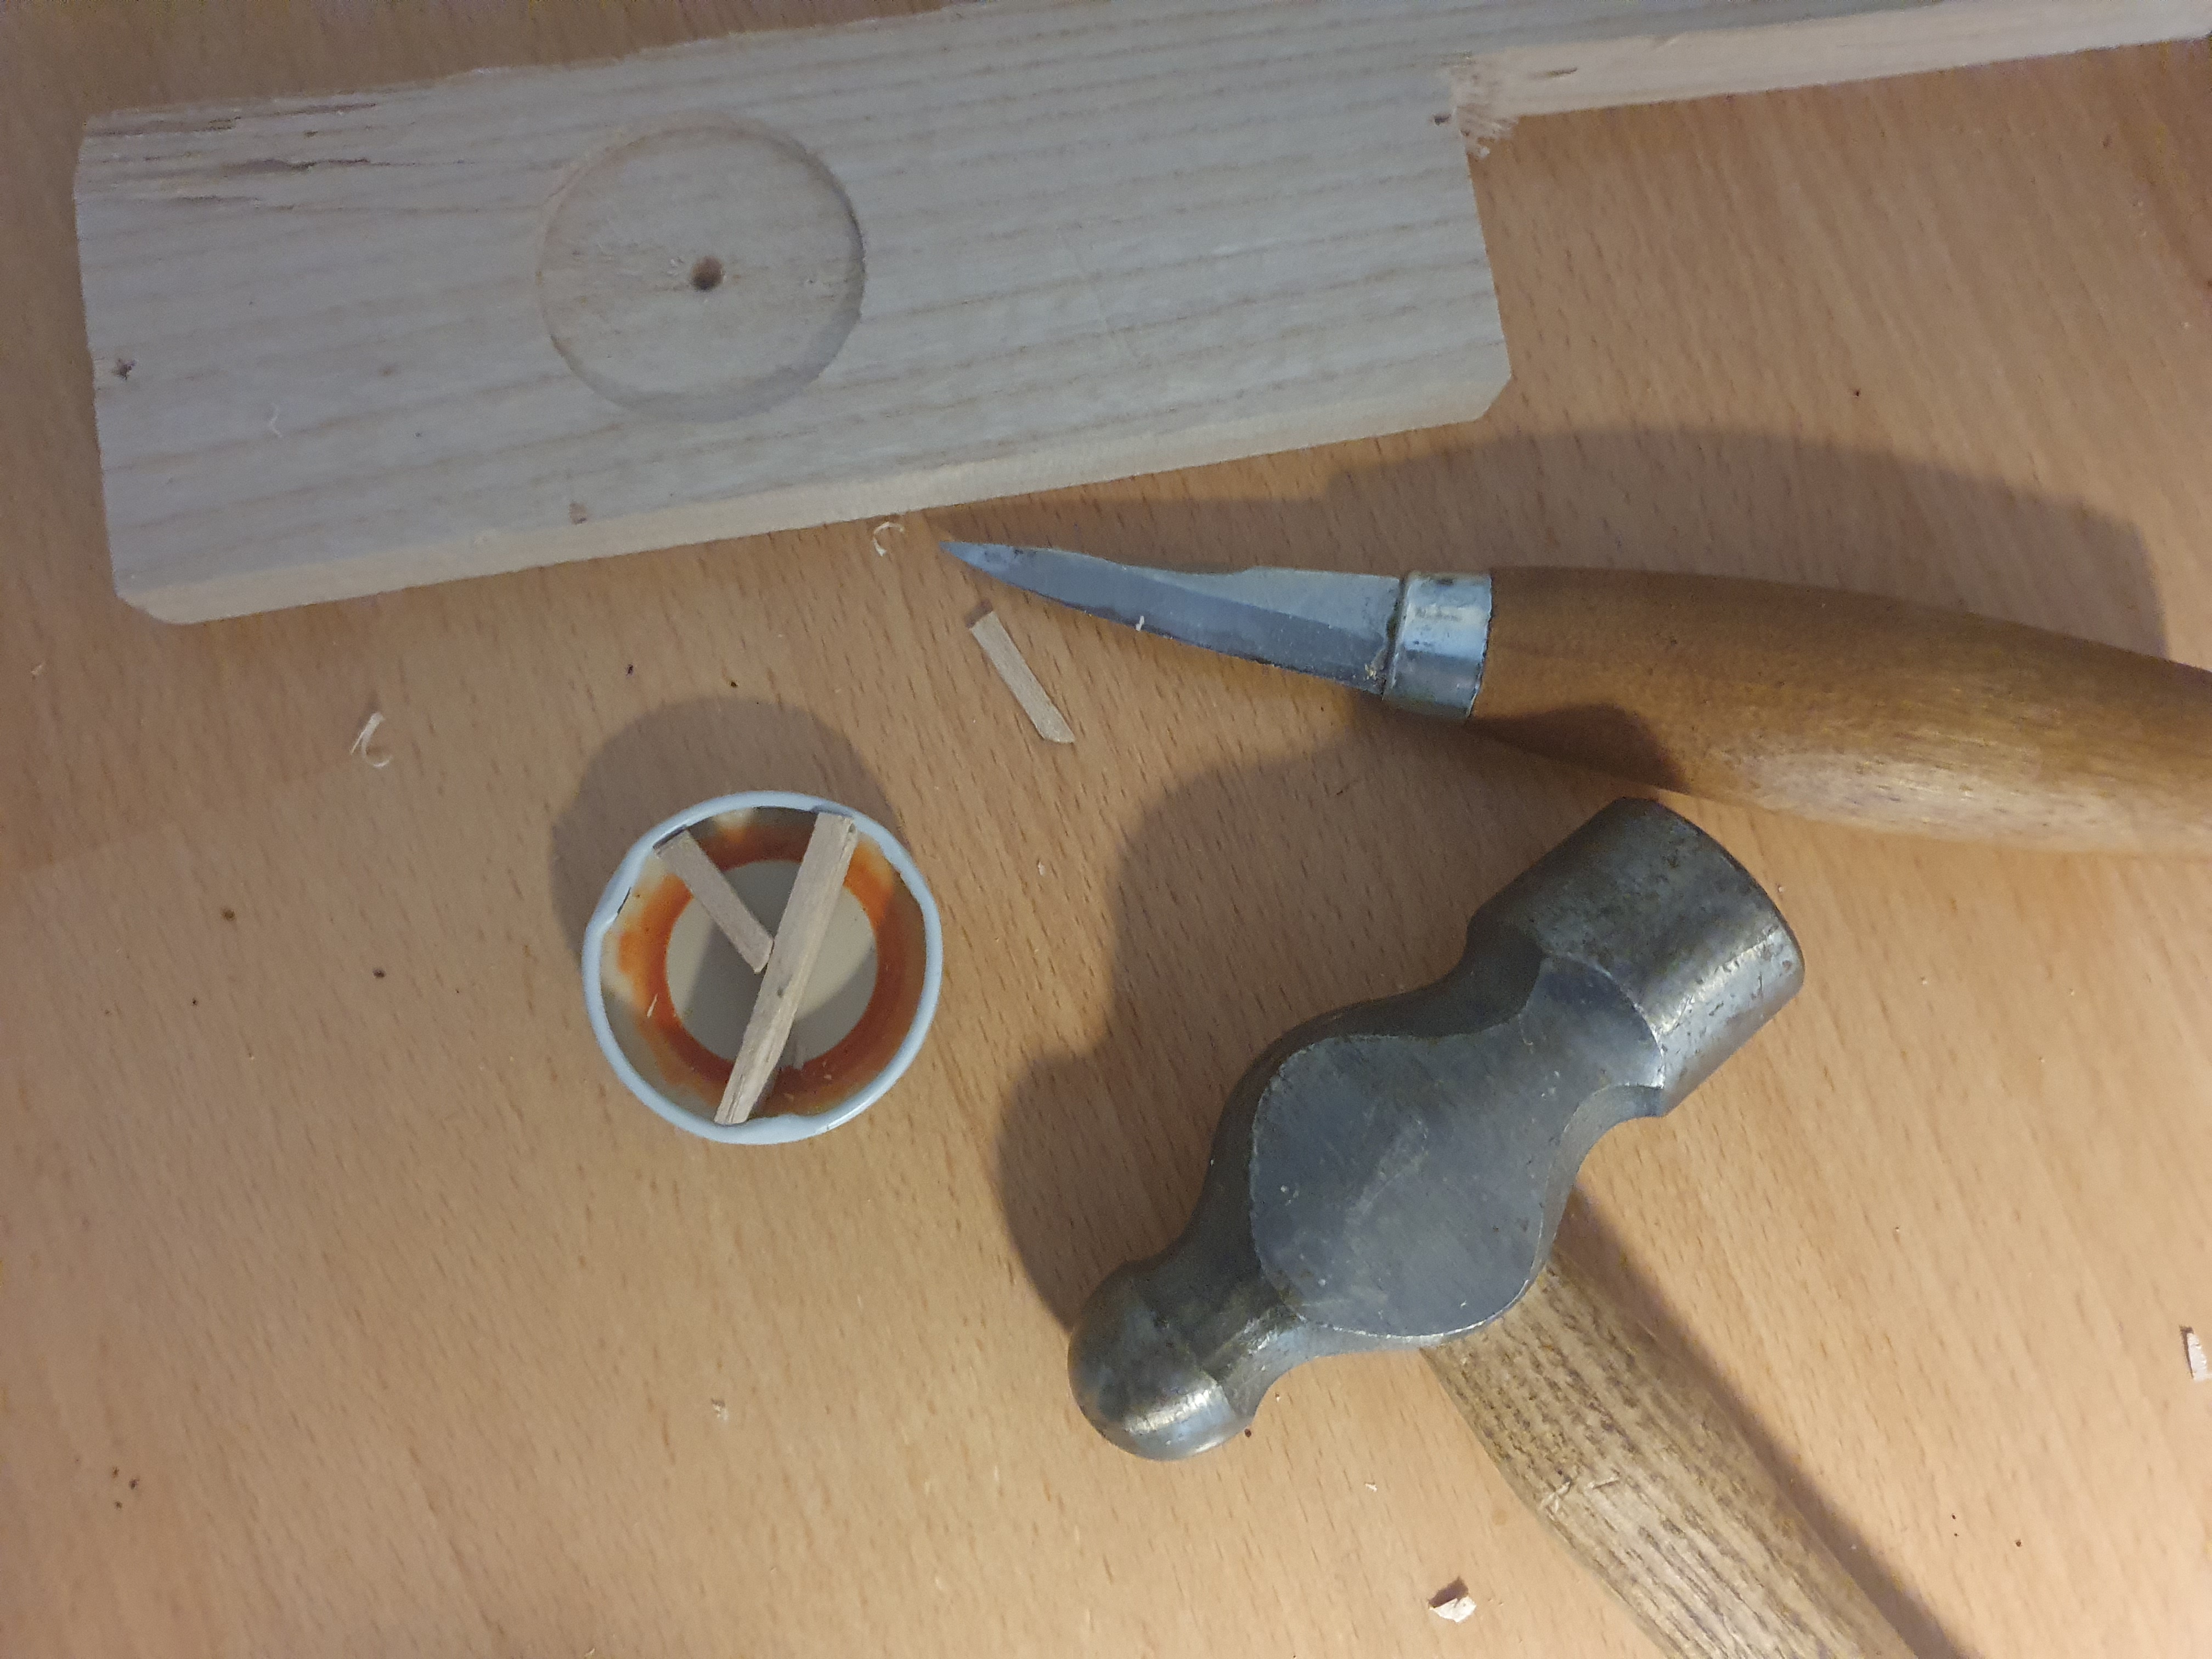
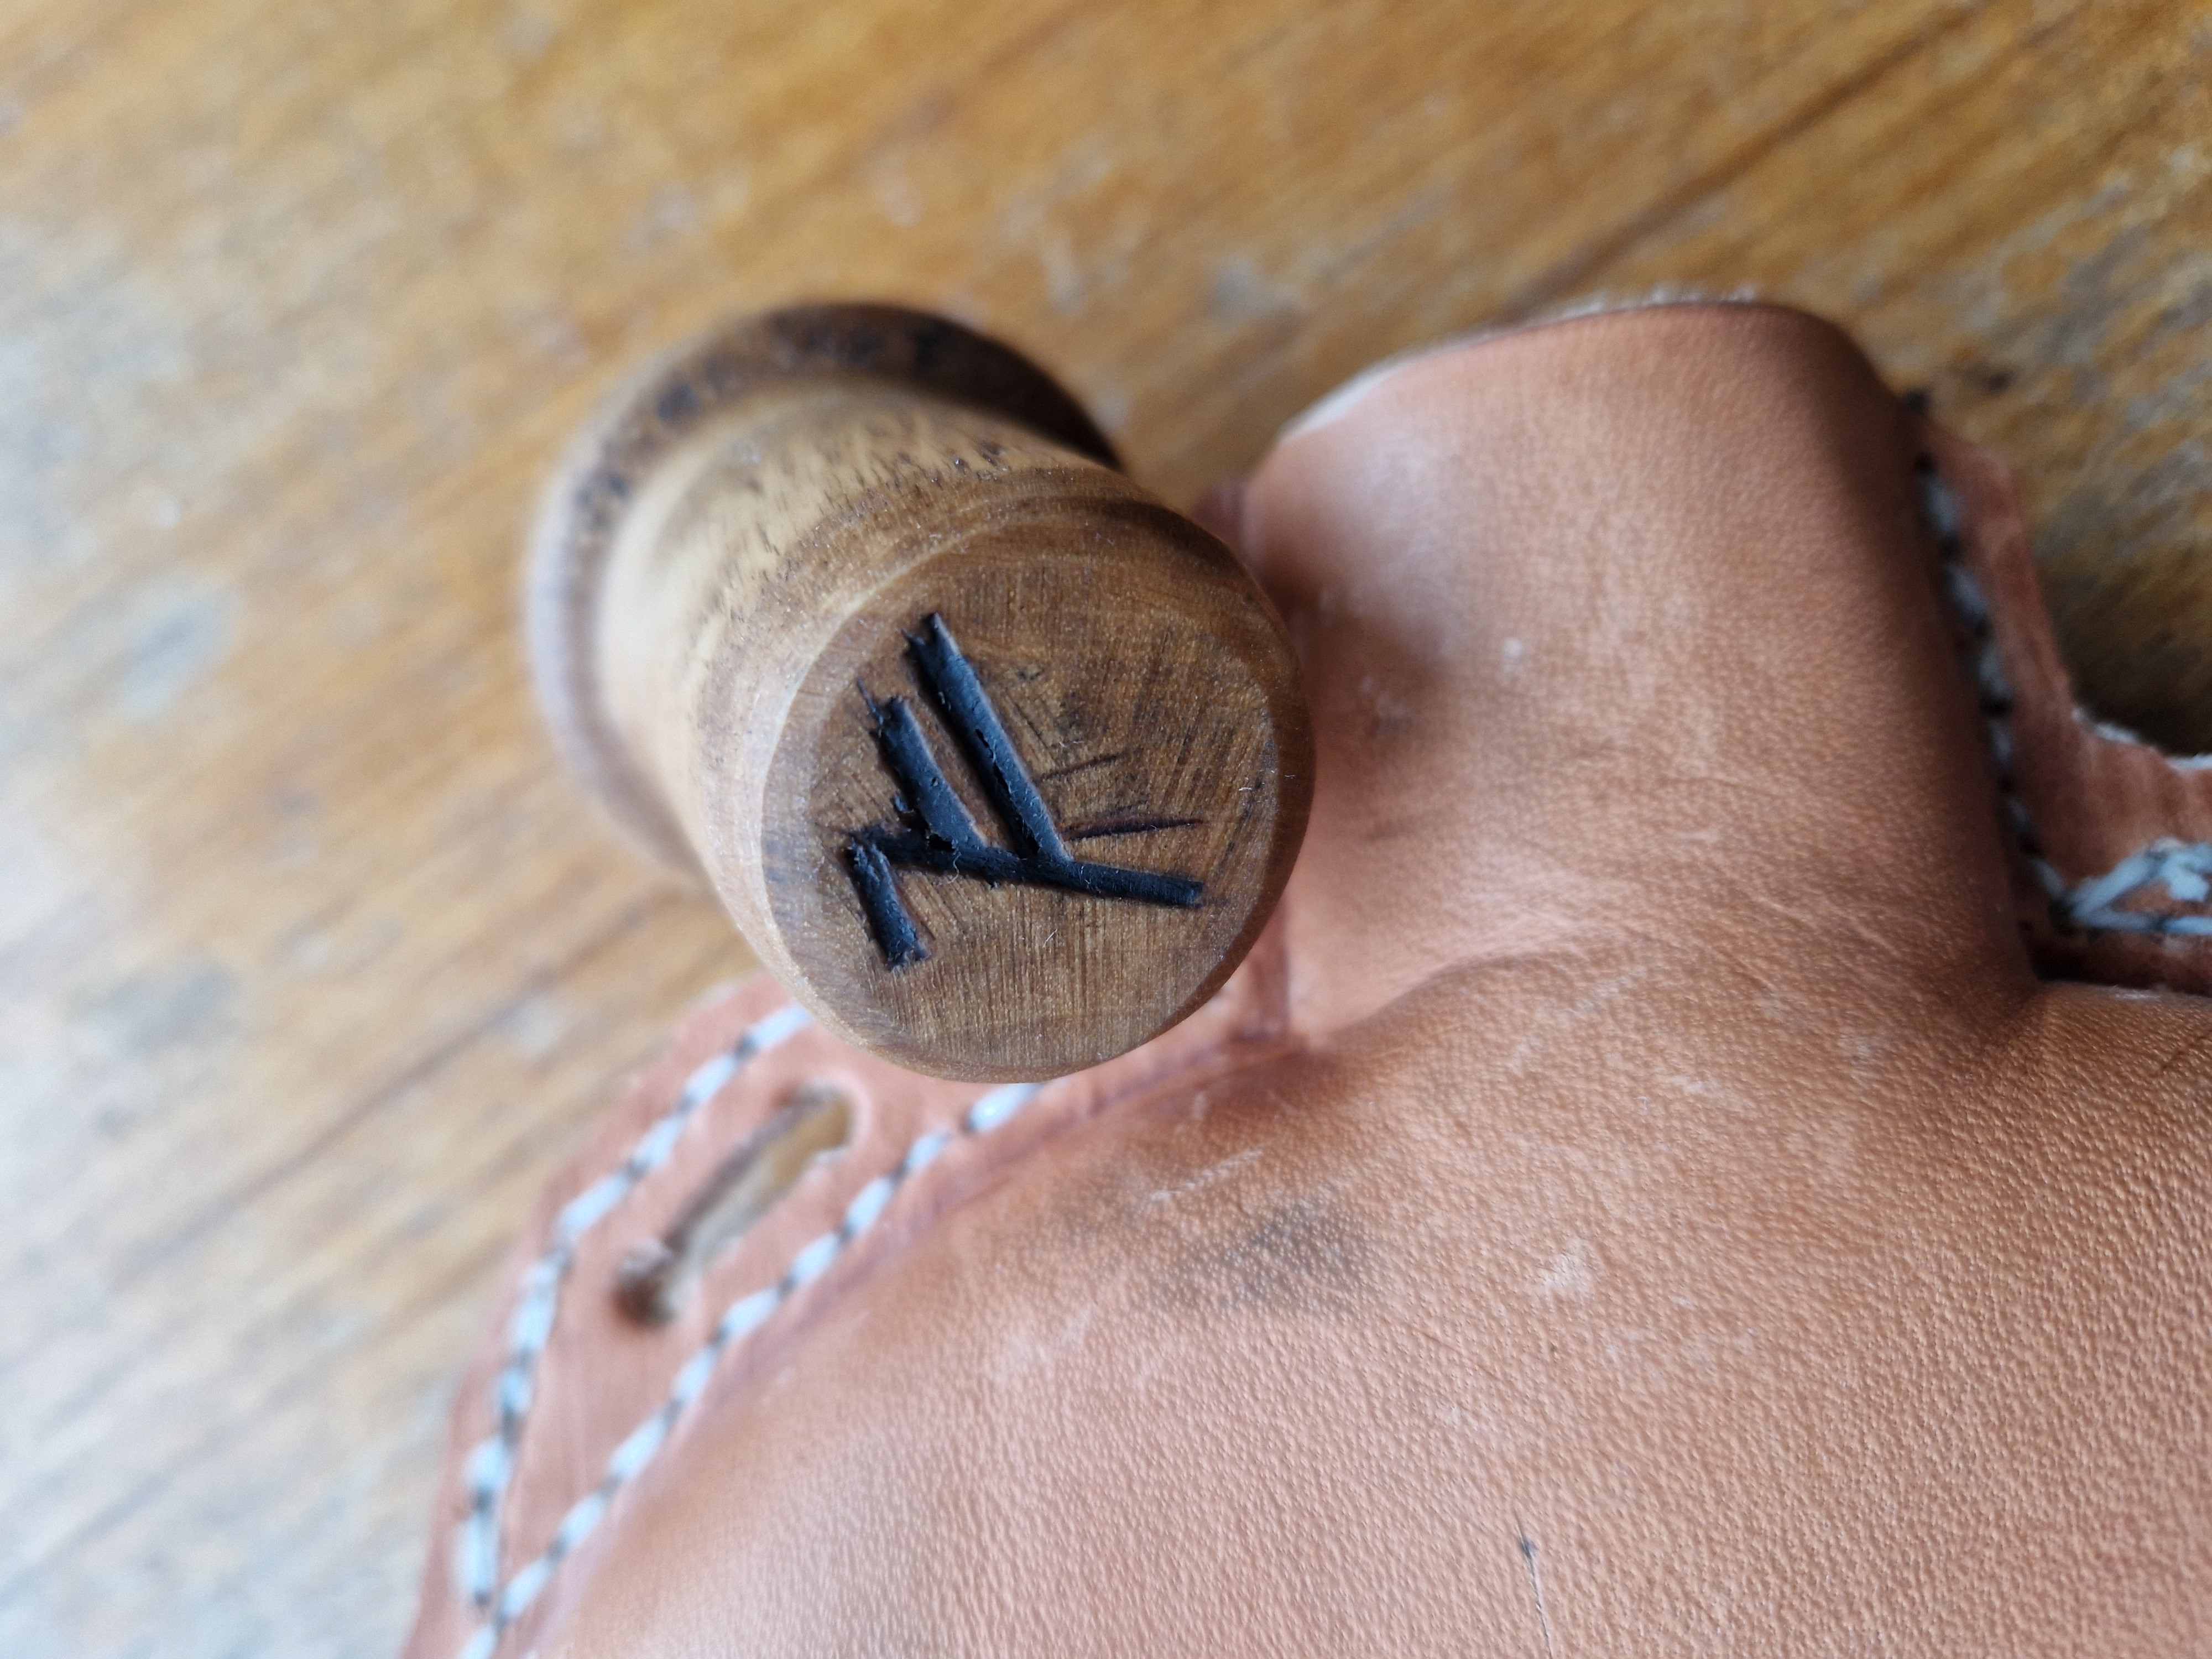
Creating a plug
The plug was created first using a wood turner to get the initial shape, then a drill and a knife to get the details, and last a chisel to mark it.
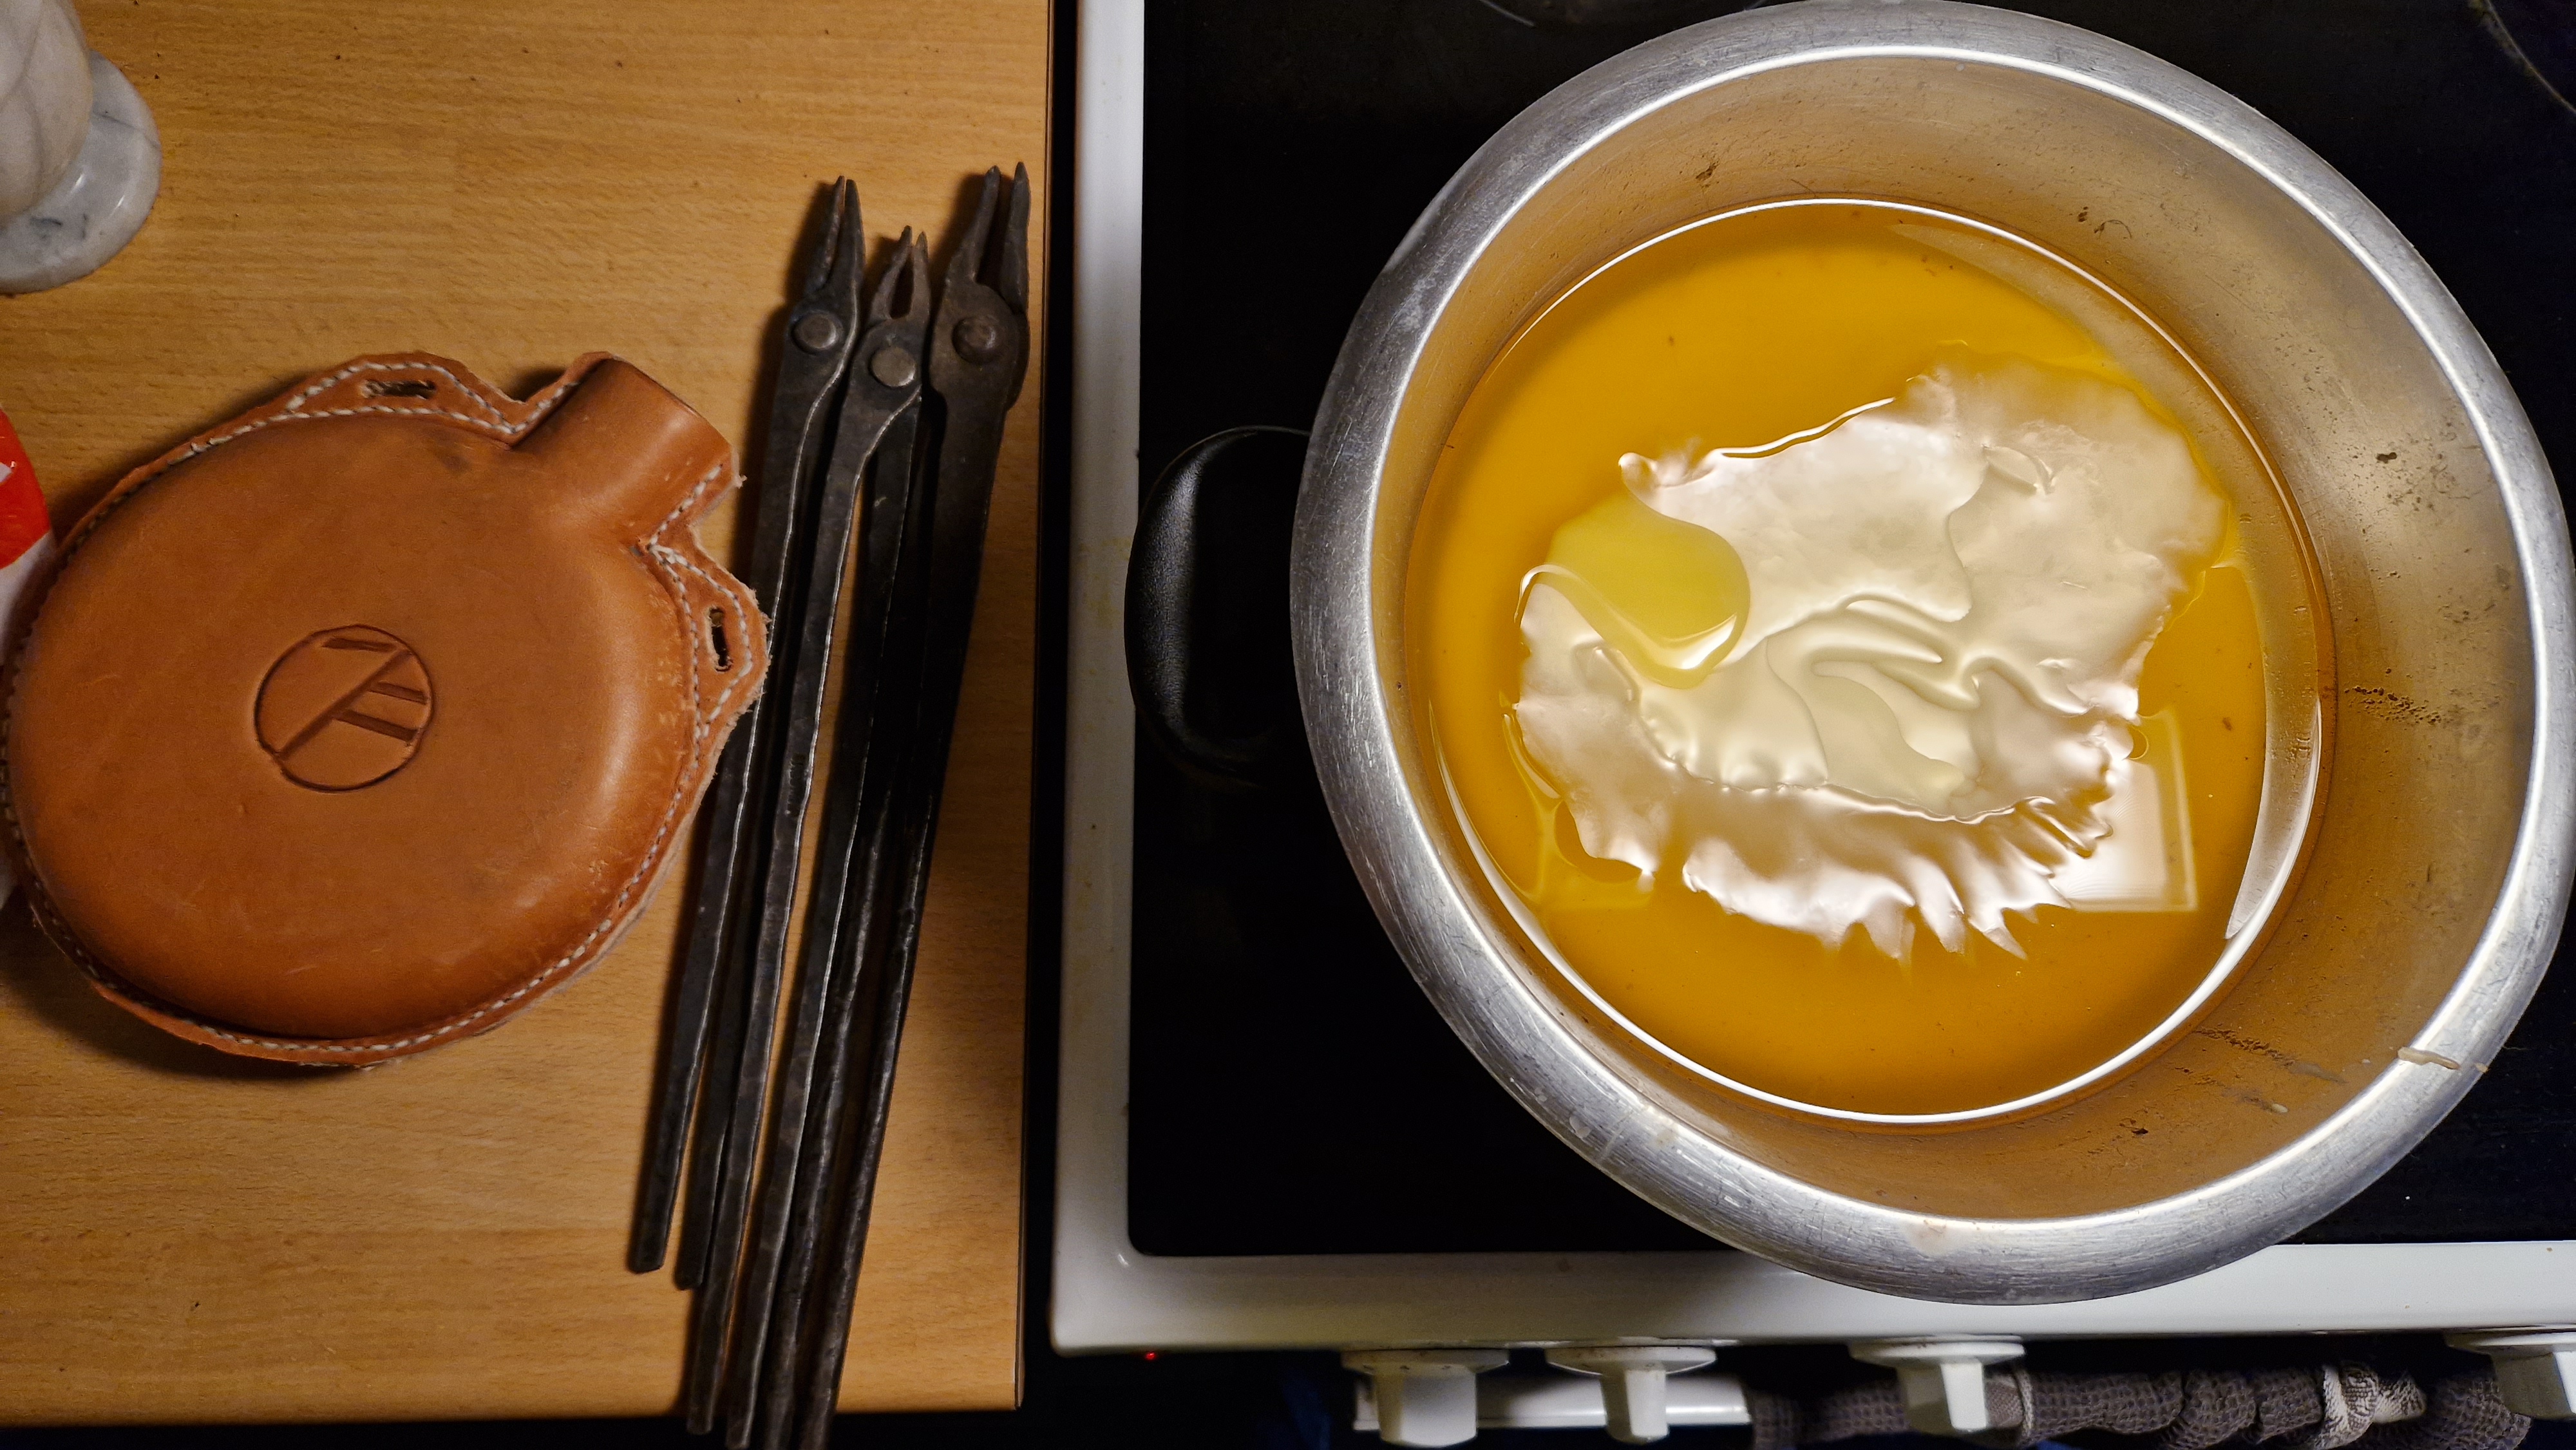
For protection tanned wax was used.


Dipping the flask in bees wax
The water flask might look a bit rough, but when dipped in melted wax it's possible to smooth out the seams and leather edges as well.
Before I could dip the flask in wax I had to clean the wax since it was straight from the hive and very ugly. More about that in a separate article.

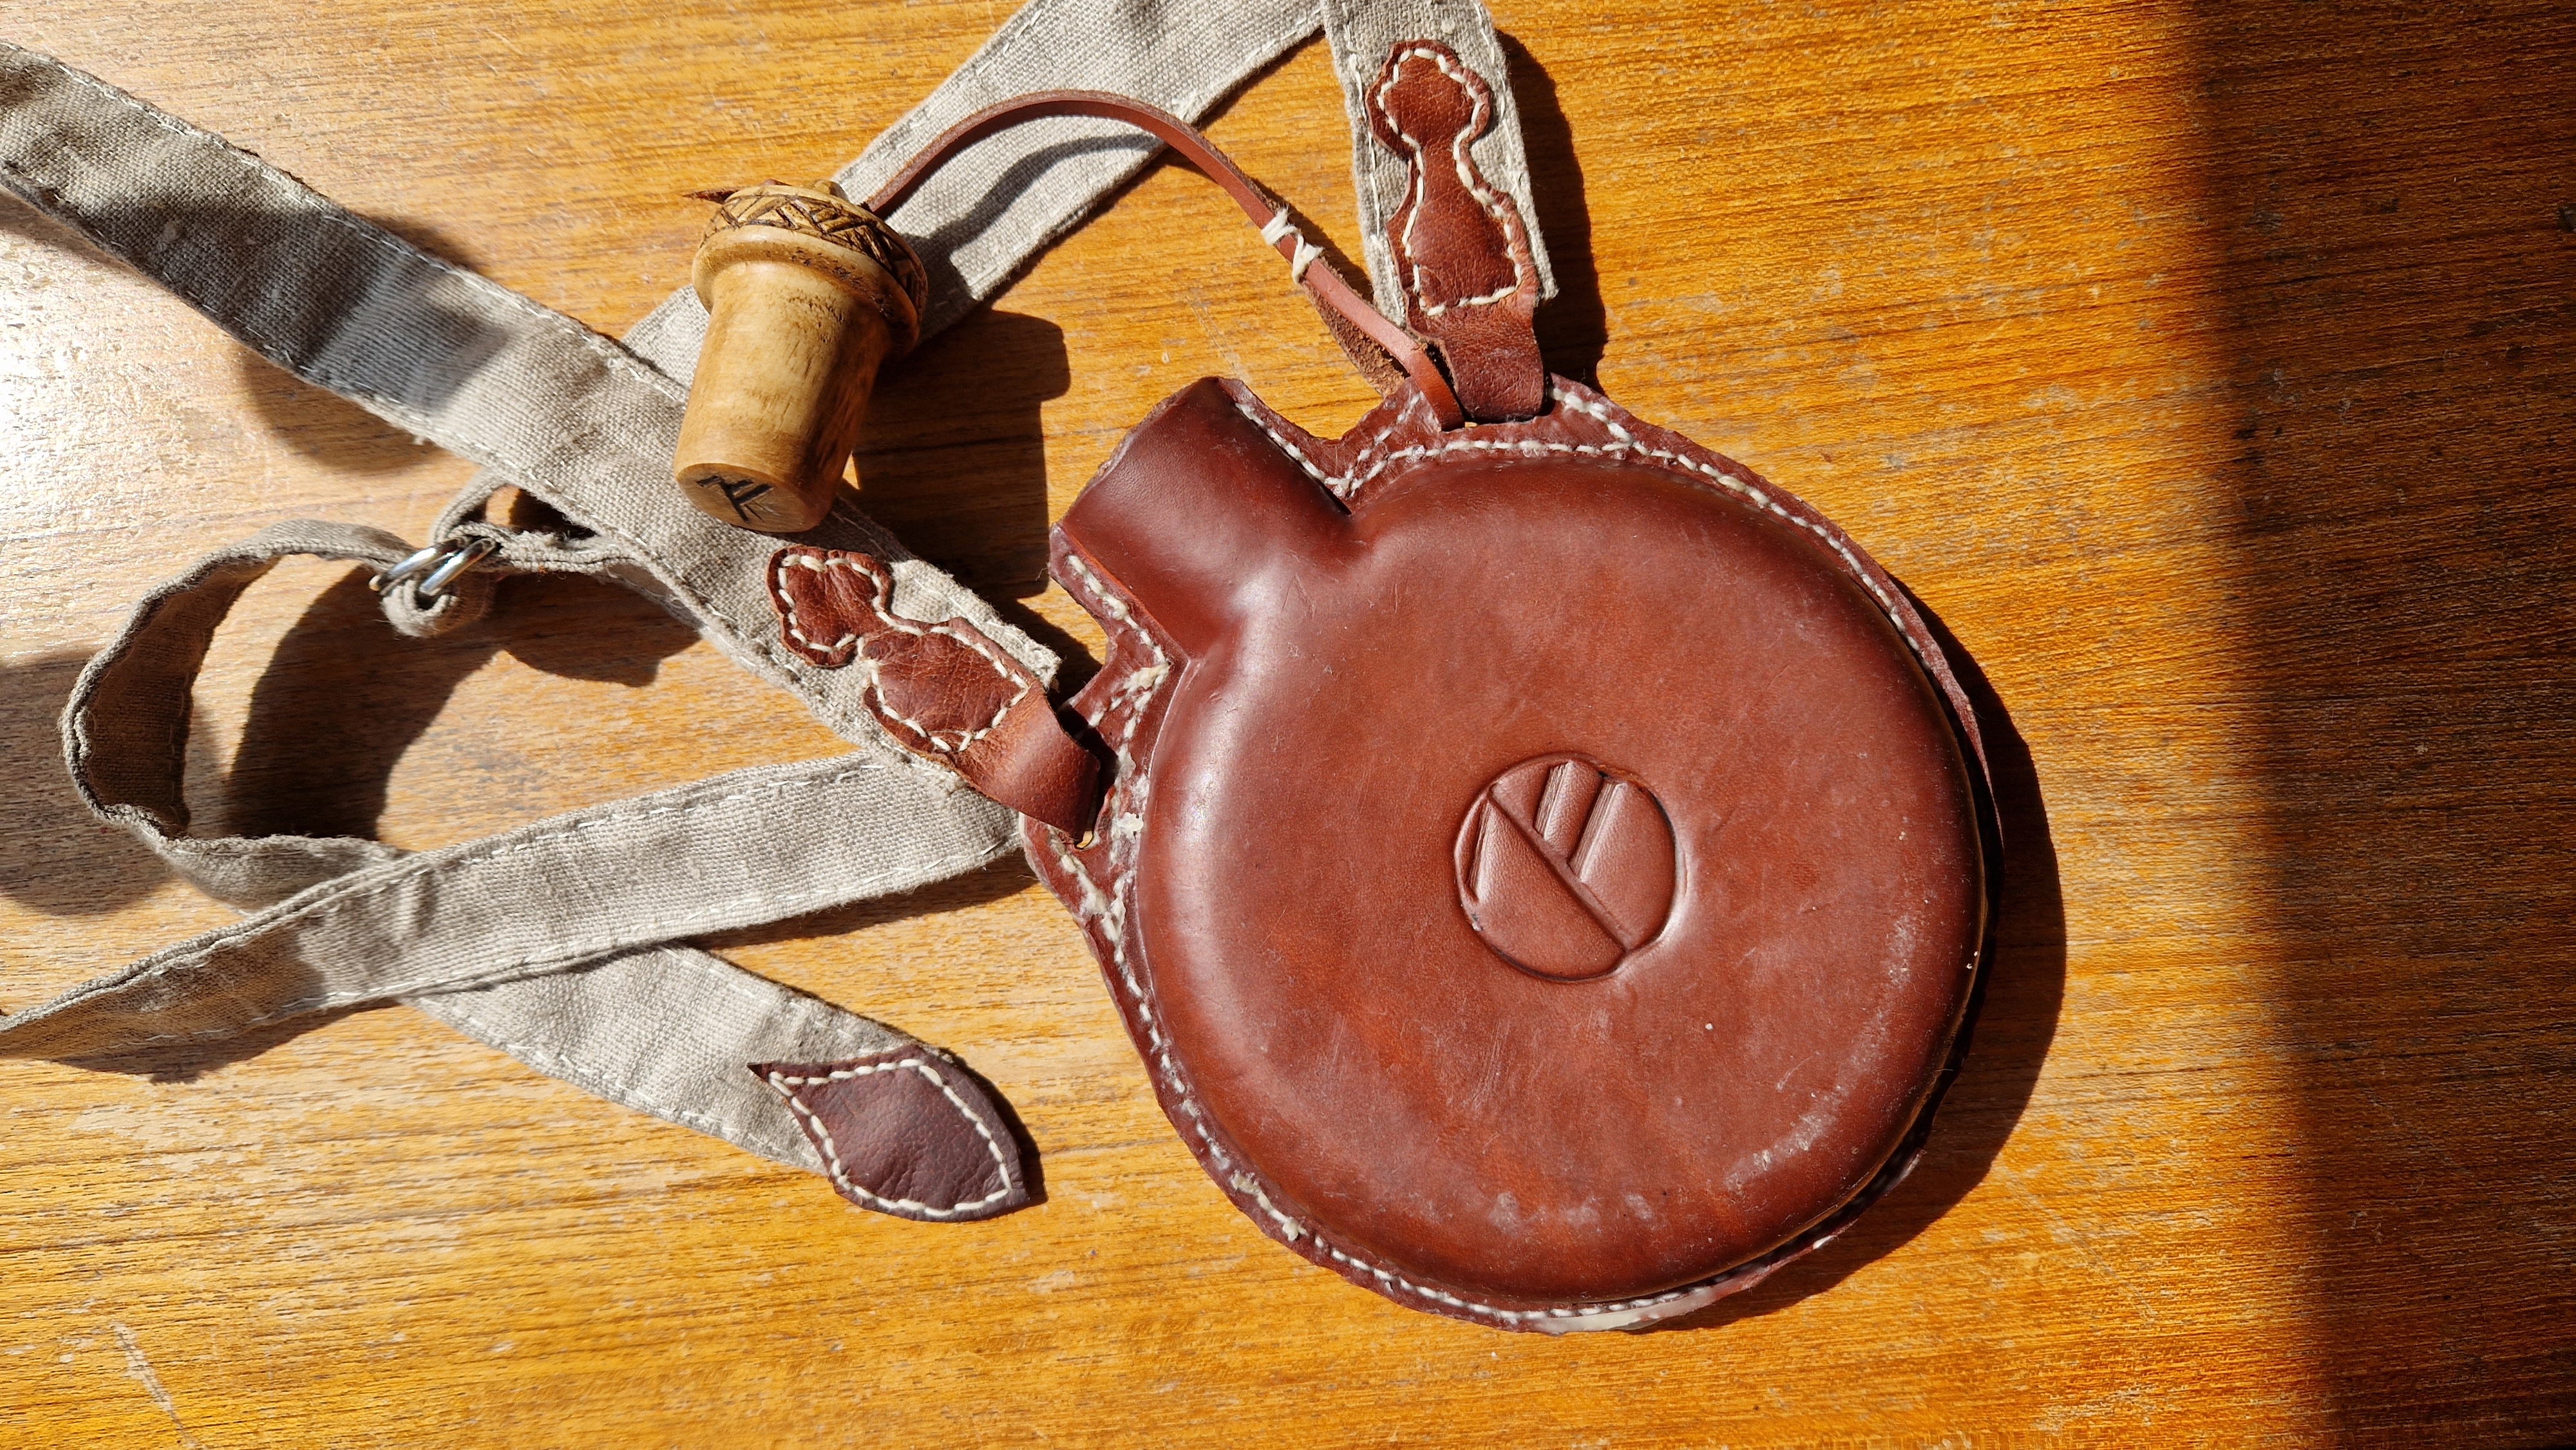
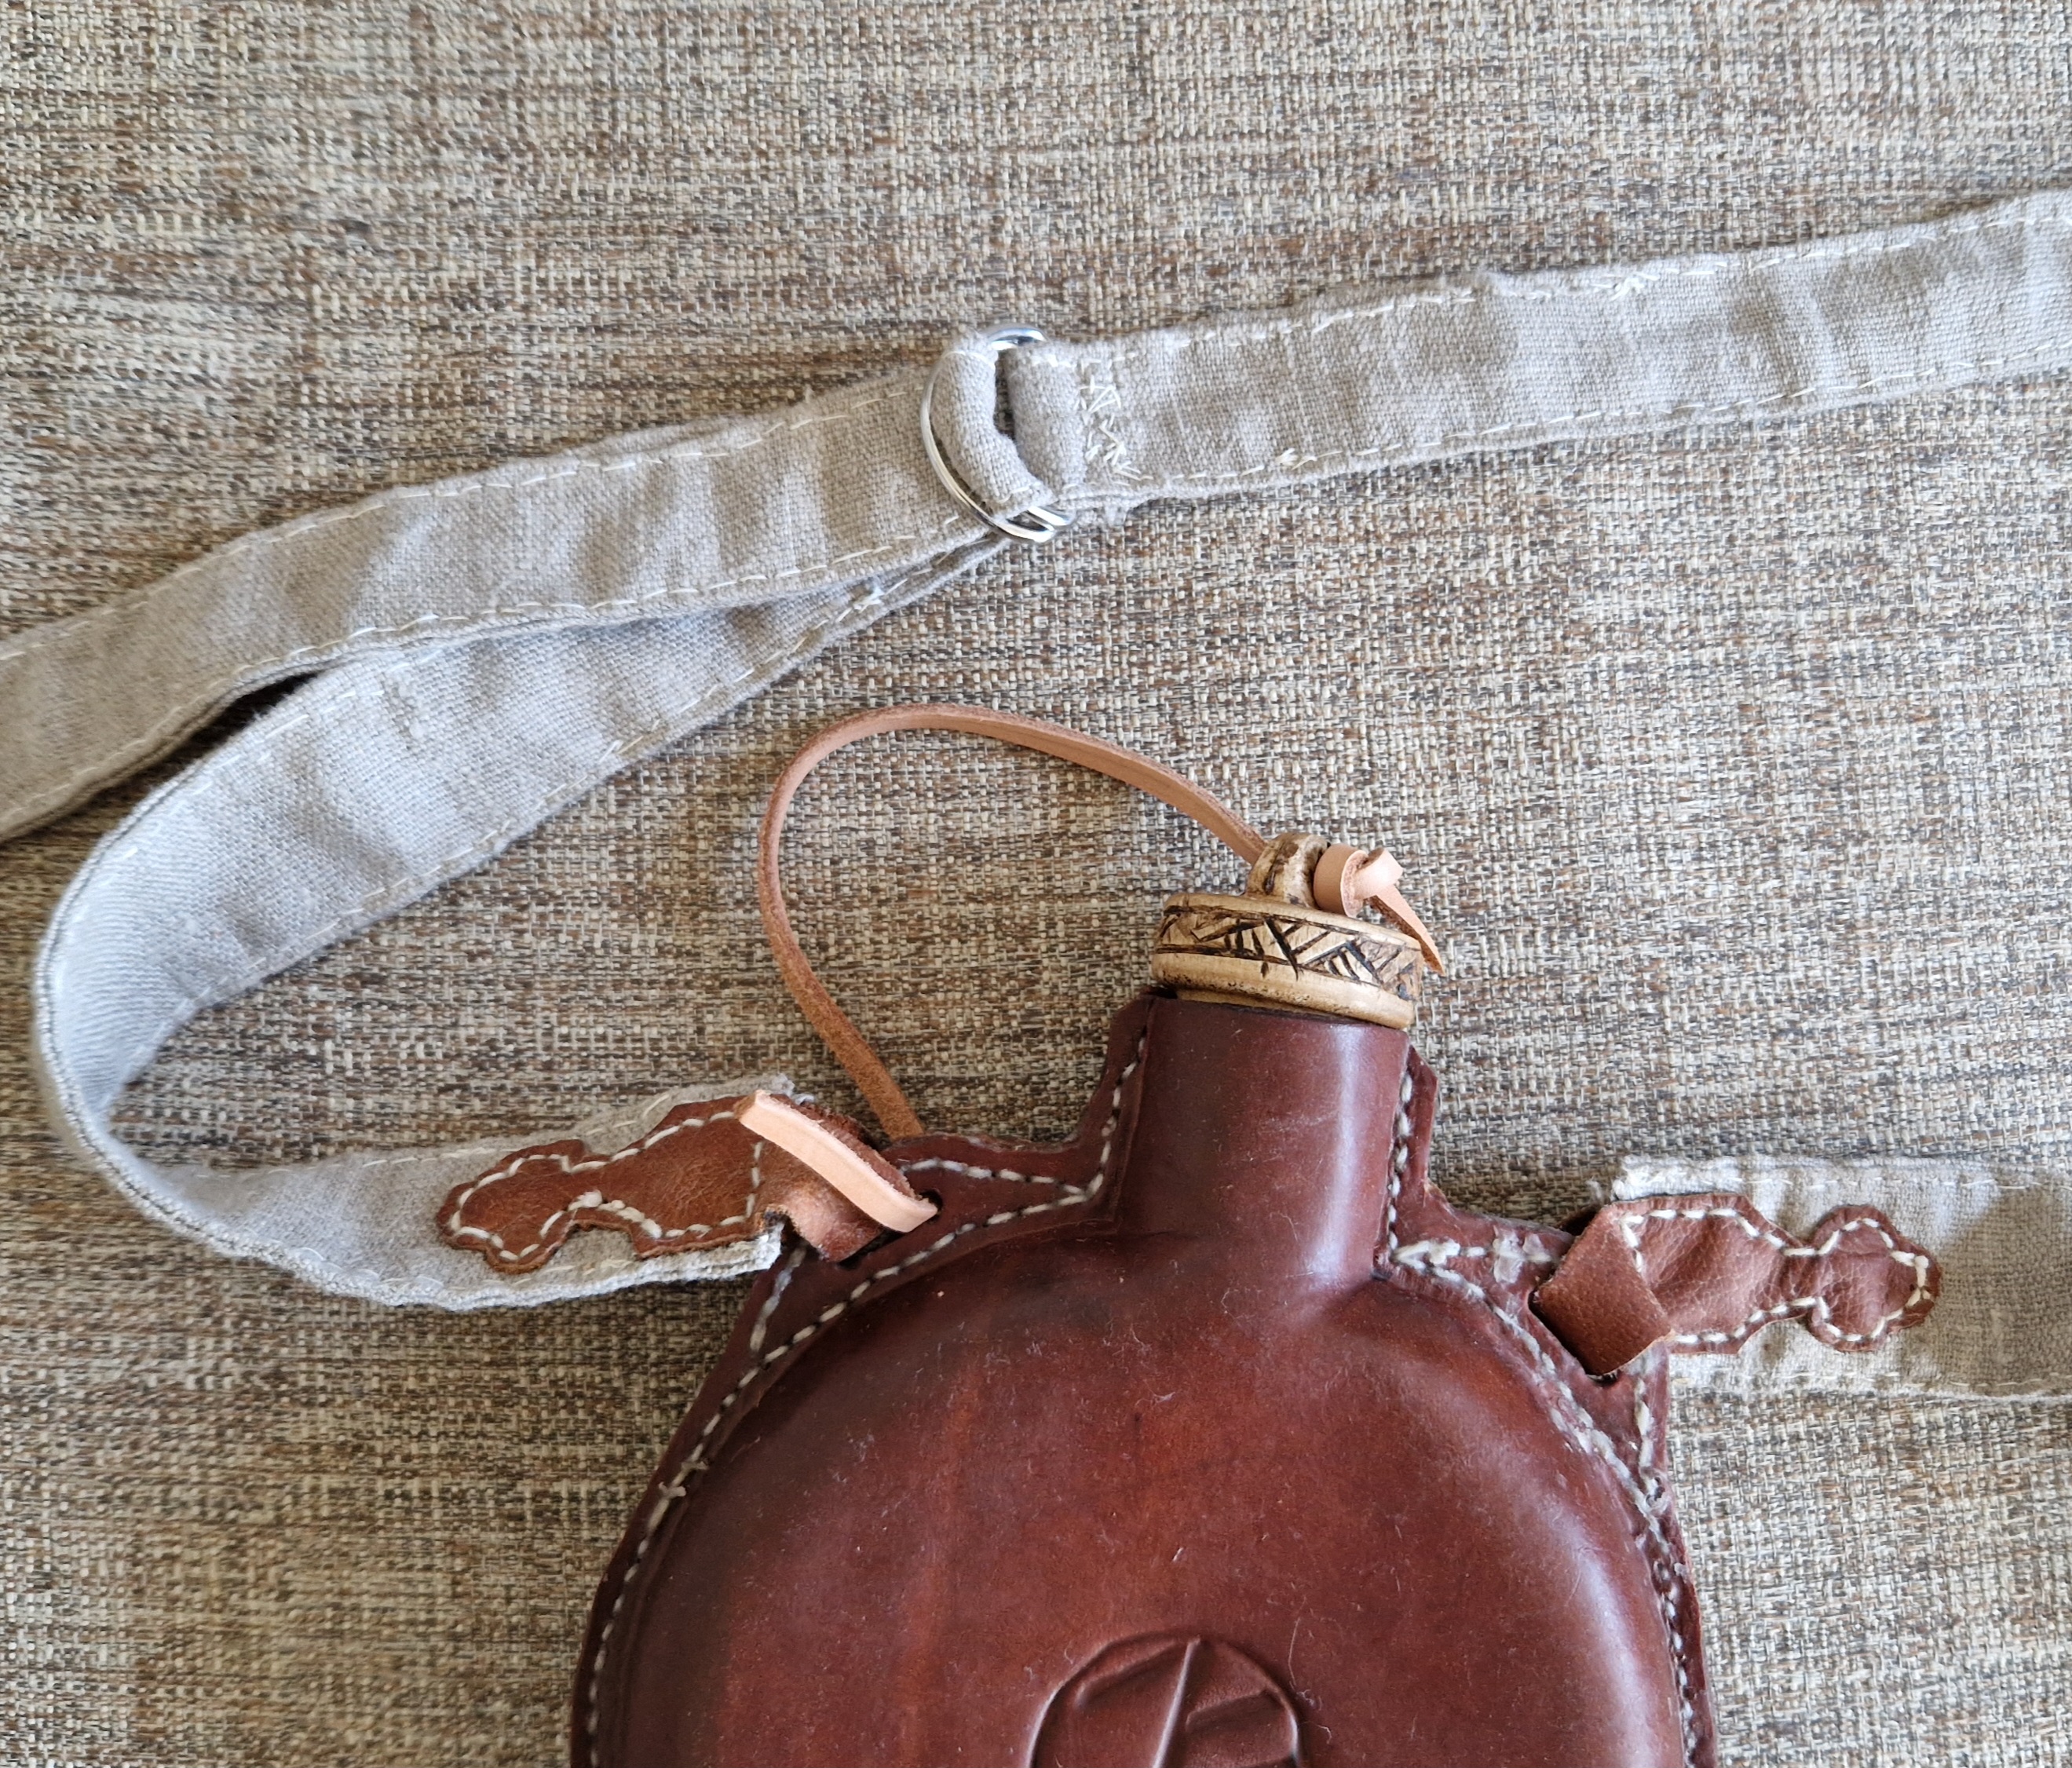
Creating a carrying strap
The water bottle needs a carrying strap. To vary the materials I opted for a few layers of linnen rather than a leather belt. One of the reasons is for hot summer days a linnen strap feels better towards the skin.
I found a way to fold the linnen into four layers without the edges of the fabric pointing out since I thought this would produce a strap that's more comfortable to wear.
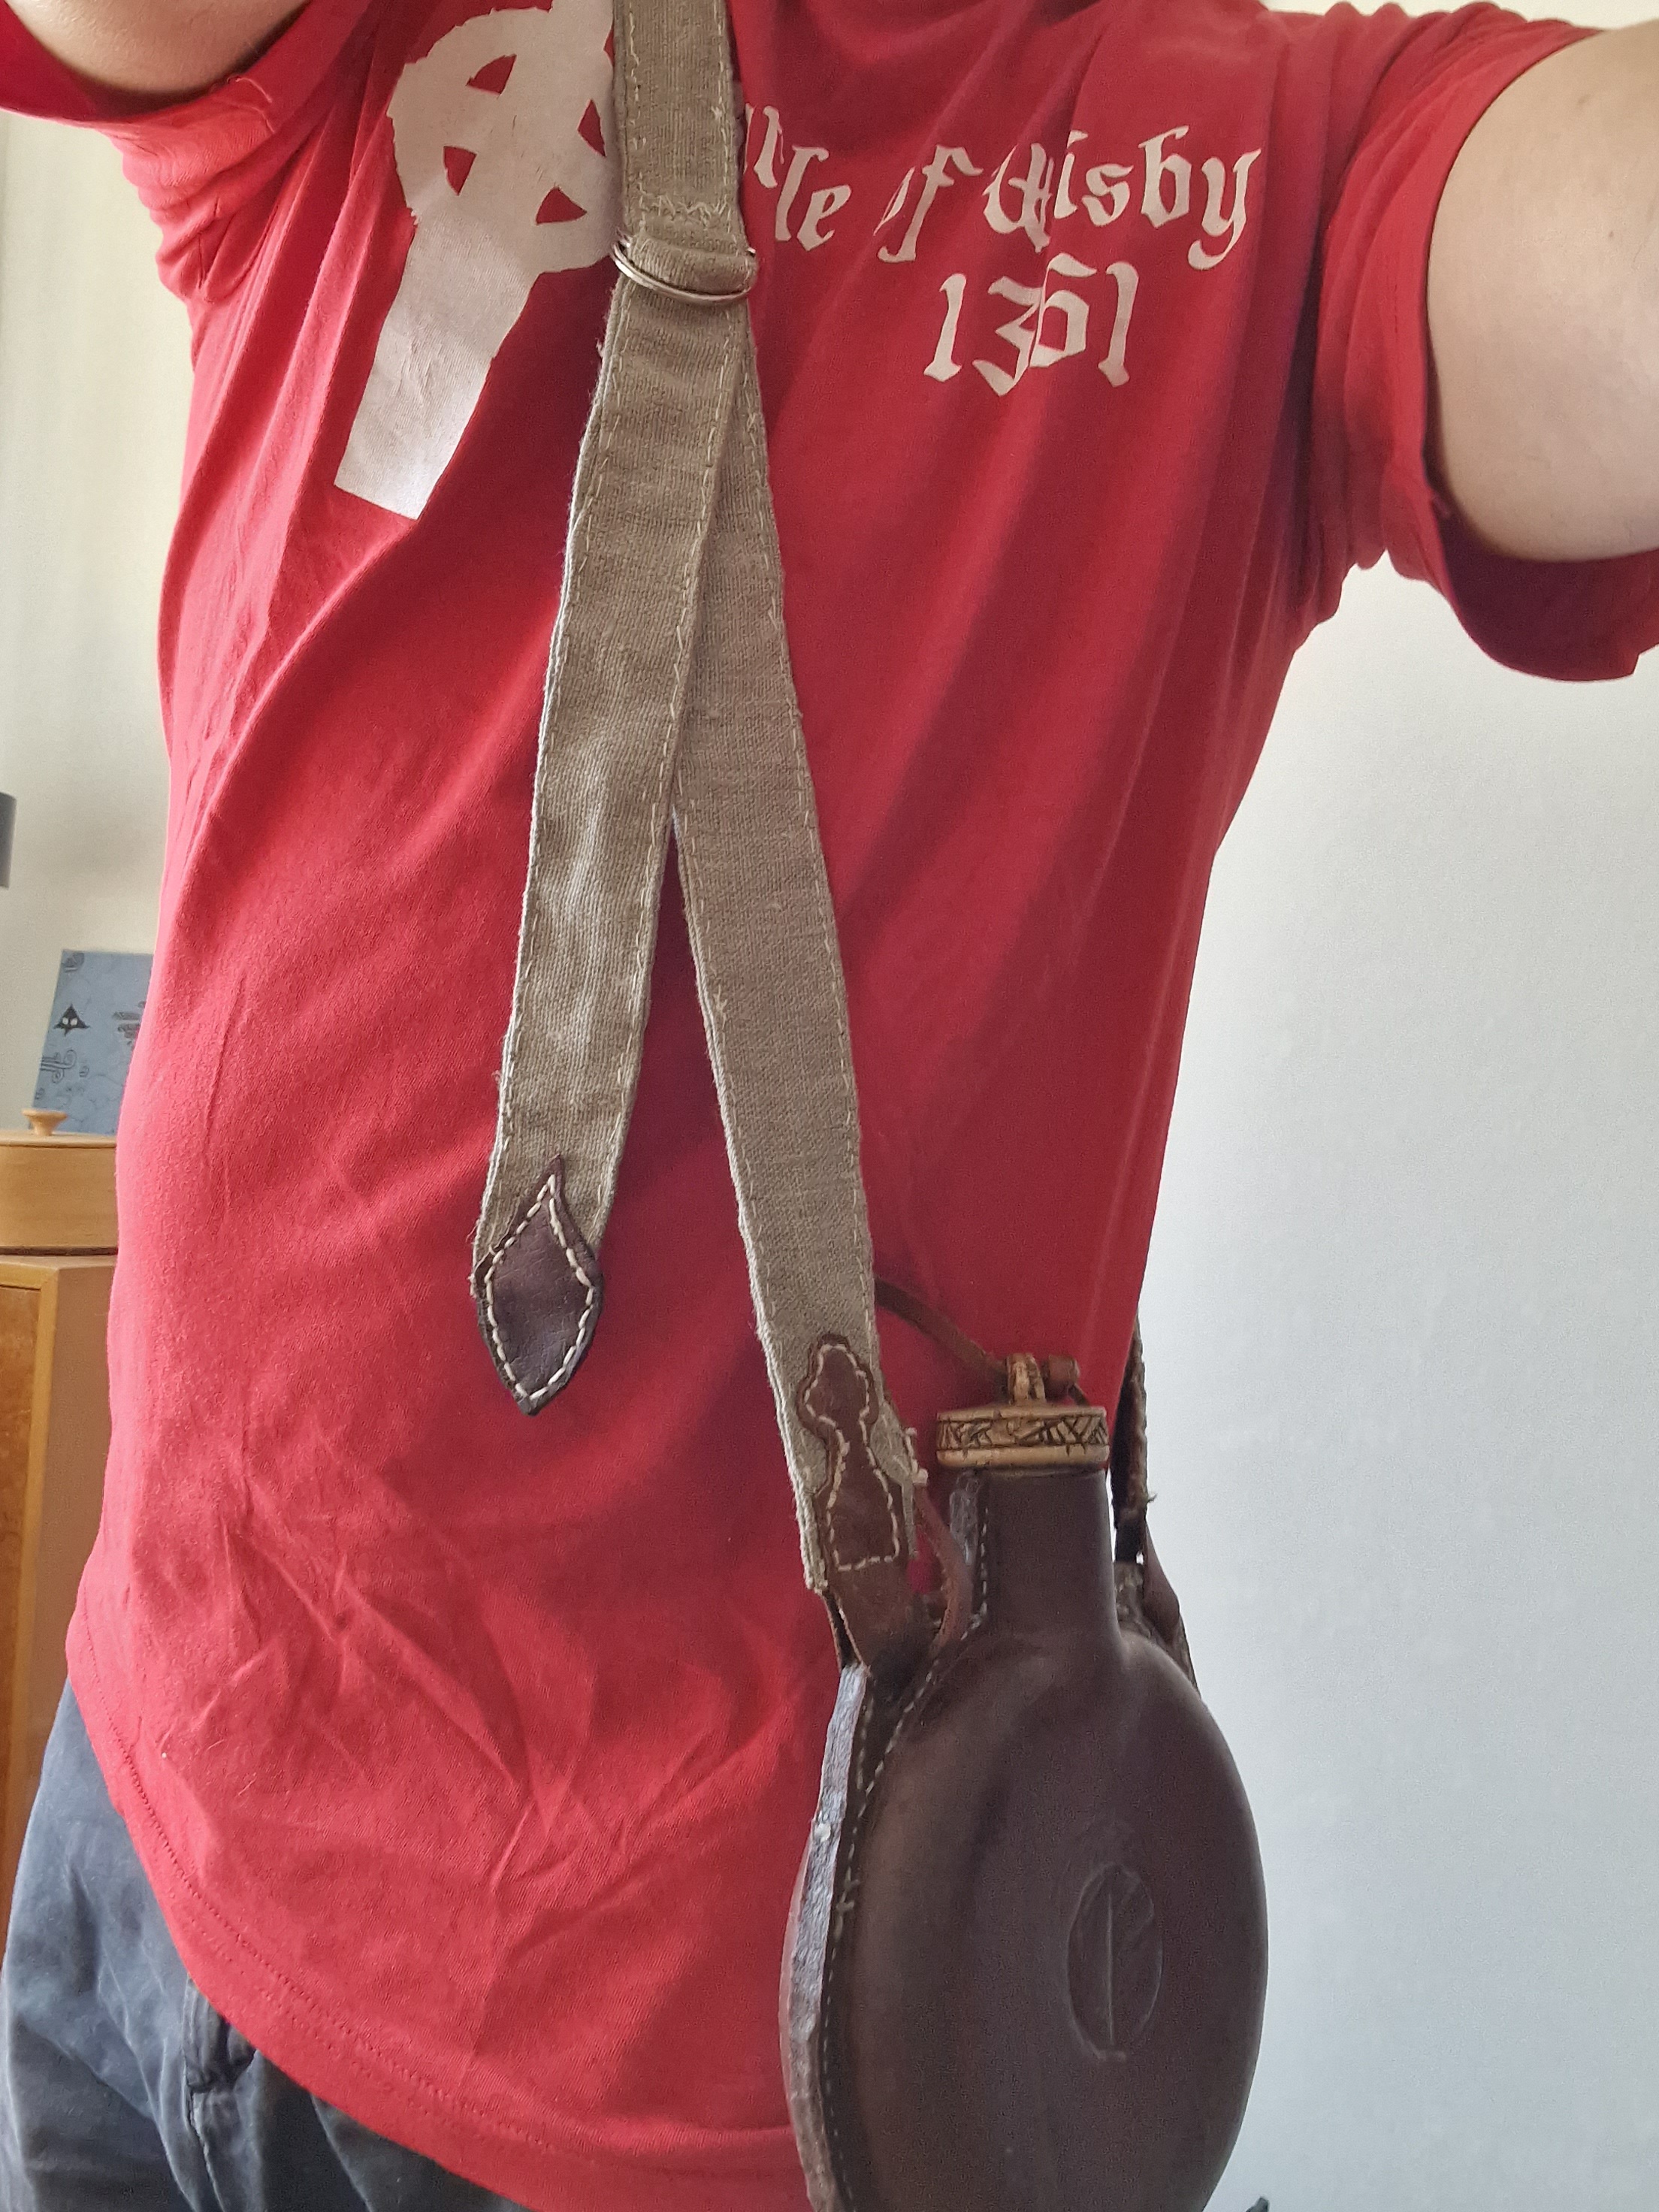
The strap should be adjustable for comfort, and to be able to carry the flask comfortably both with bulky armor and while semi-naked, and both for me and for my shorter daughters if they want to use it.

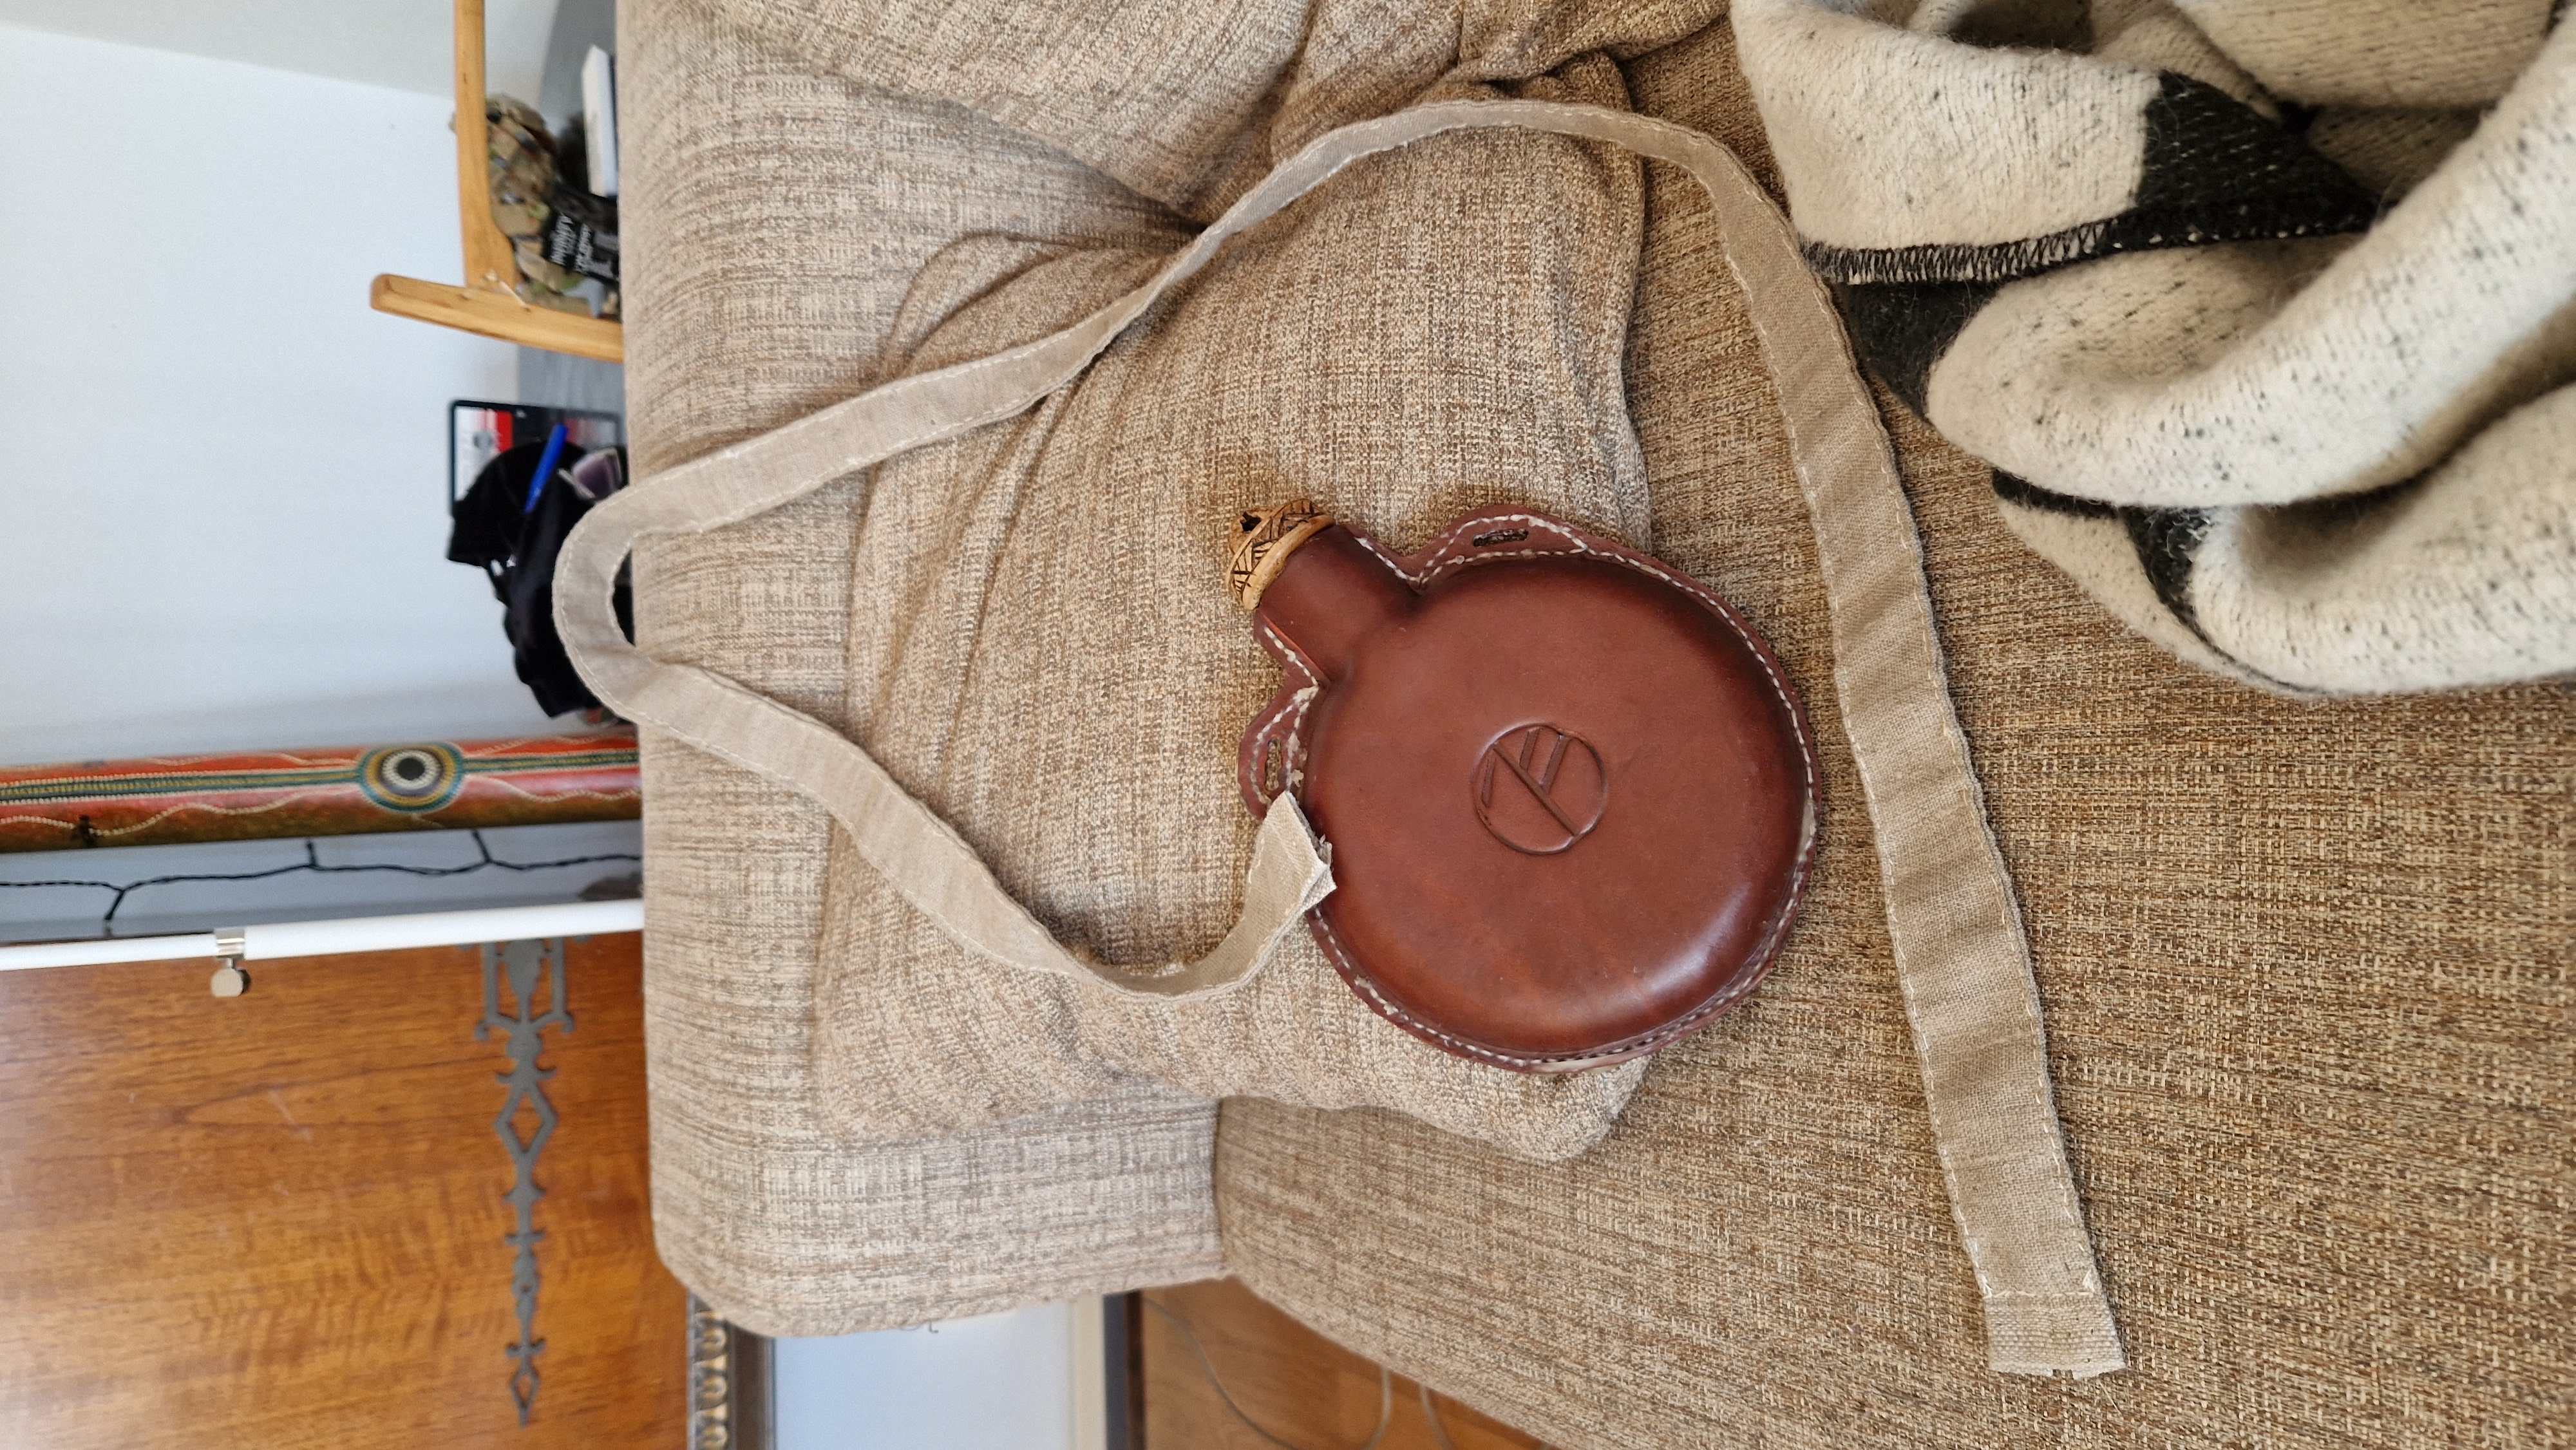
Attaching the carrying strap
There are many ways of attaching the carrying strap to the bottle. I wanted something that had a few details, but not to complicated and eventually choosed some vaguely medieval pattern.
Sewing to sides of leather around the four layer linnen strap proved a bit more cumbersome than expected, but in the end I'm pleased with the result.
The key to succeeding was to mark the holes in the leather in a detailed pattern before even trying to sew it together.
The angle of the leather piece might look a bit strange but it help the perfect curve shape of the carrying strap around the body.

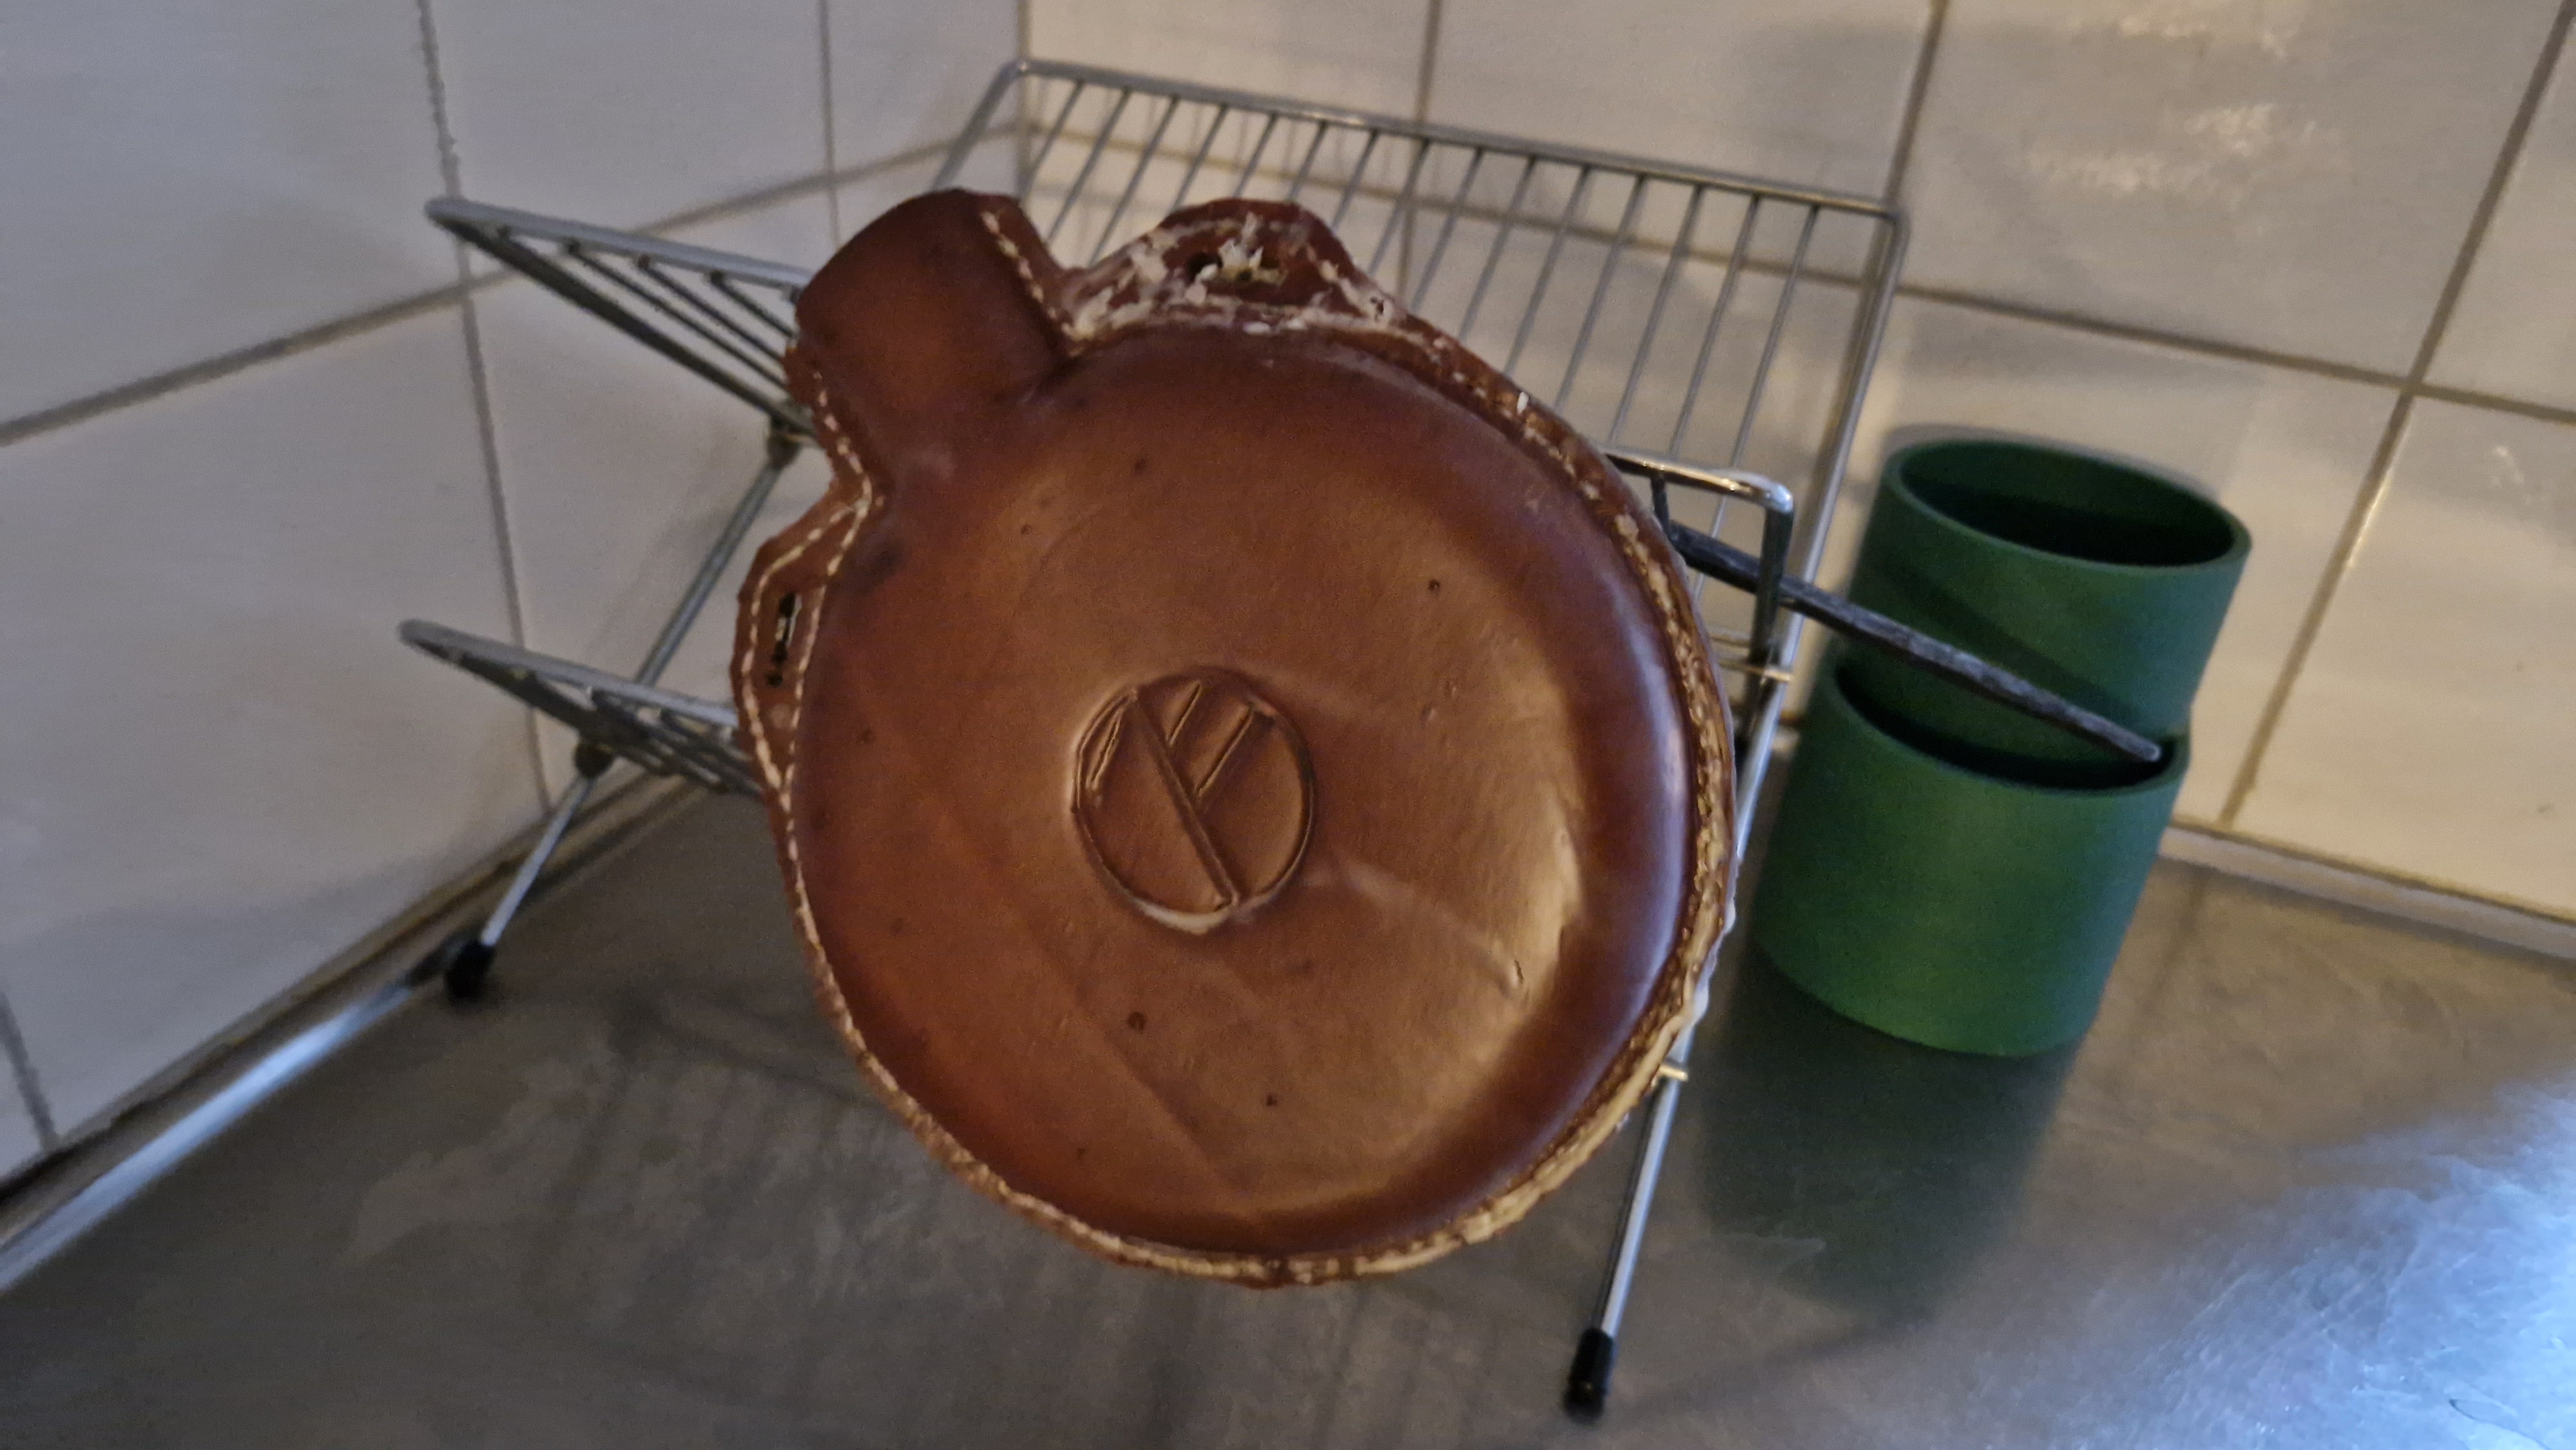
Oiling the leather
Putting grease on the leather protect it, softens it, and makes it more beautiful by enhancing the contrast to the waxed linnen thread.


Making the carrying strap adjustable
For a long time I wanted buttons to make the carrying strap adjustable, but I was also a bit hesitative since buttons might be uncomfortable to the skin and it would require a lot of sewing effort. Two D-loops was the final solution.
Finishing touches
The loose end of the carrying strap was given a leather ending and everything was greased up once more.

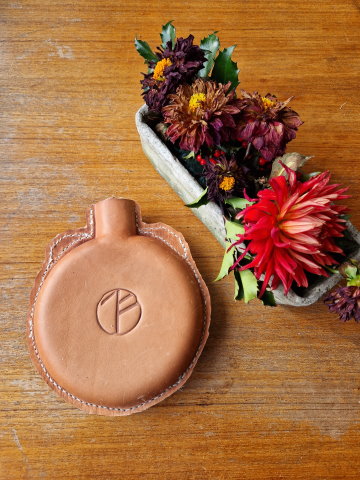
Finished product